Appium Studio for Eclipse - Simplify your Appium testing with a quick configuration of your Java project.
Once applying the configuration/nature, to your project the following changes will take place:
- A classpath container will be added so that all of the needed jar files will be available.
- A BaseTest class will be created. This class will provide some basic framework services to your test initialization.
- An AndroidDemoTest and an IOSDemoTest will be added.
- cloud.properties files are created with the information about the used cloud.
- A build.gradle is added for simple integration into CI environments like Jenkins.
To apply configuration do the following:
- Create a new Java project (or use an existing one).
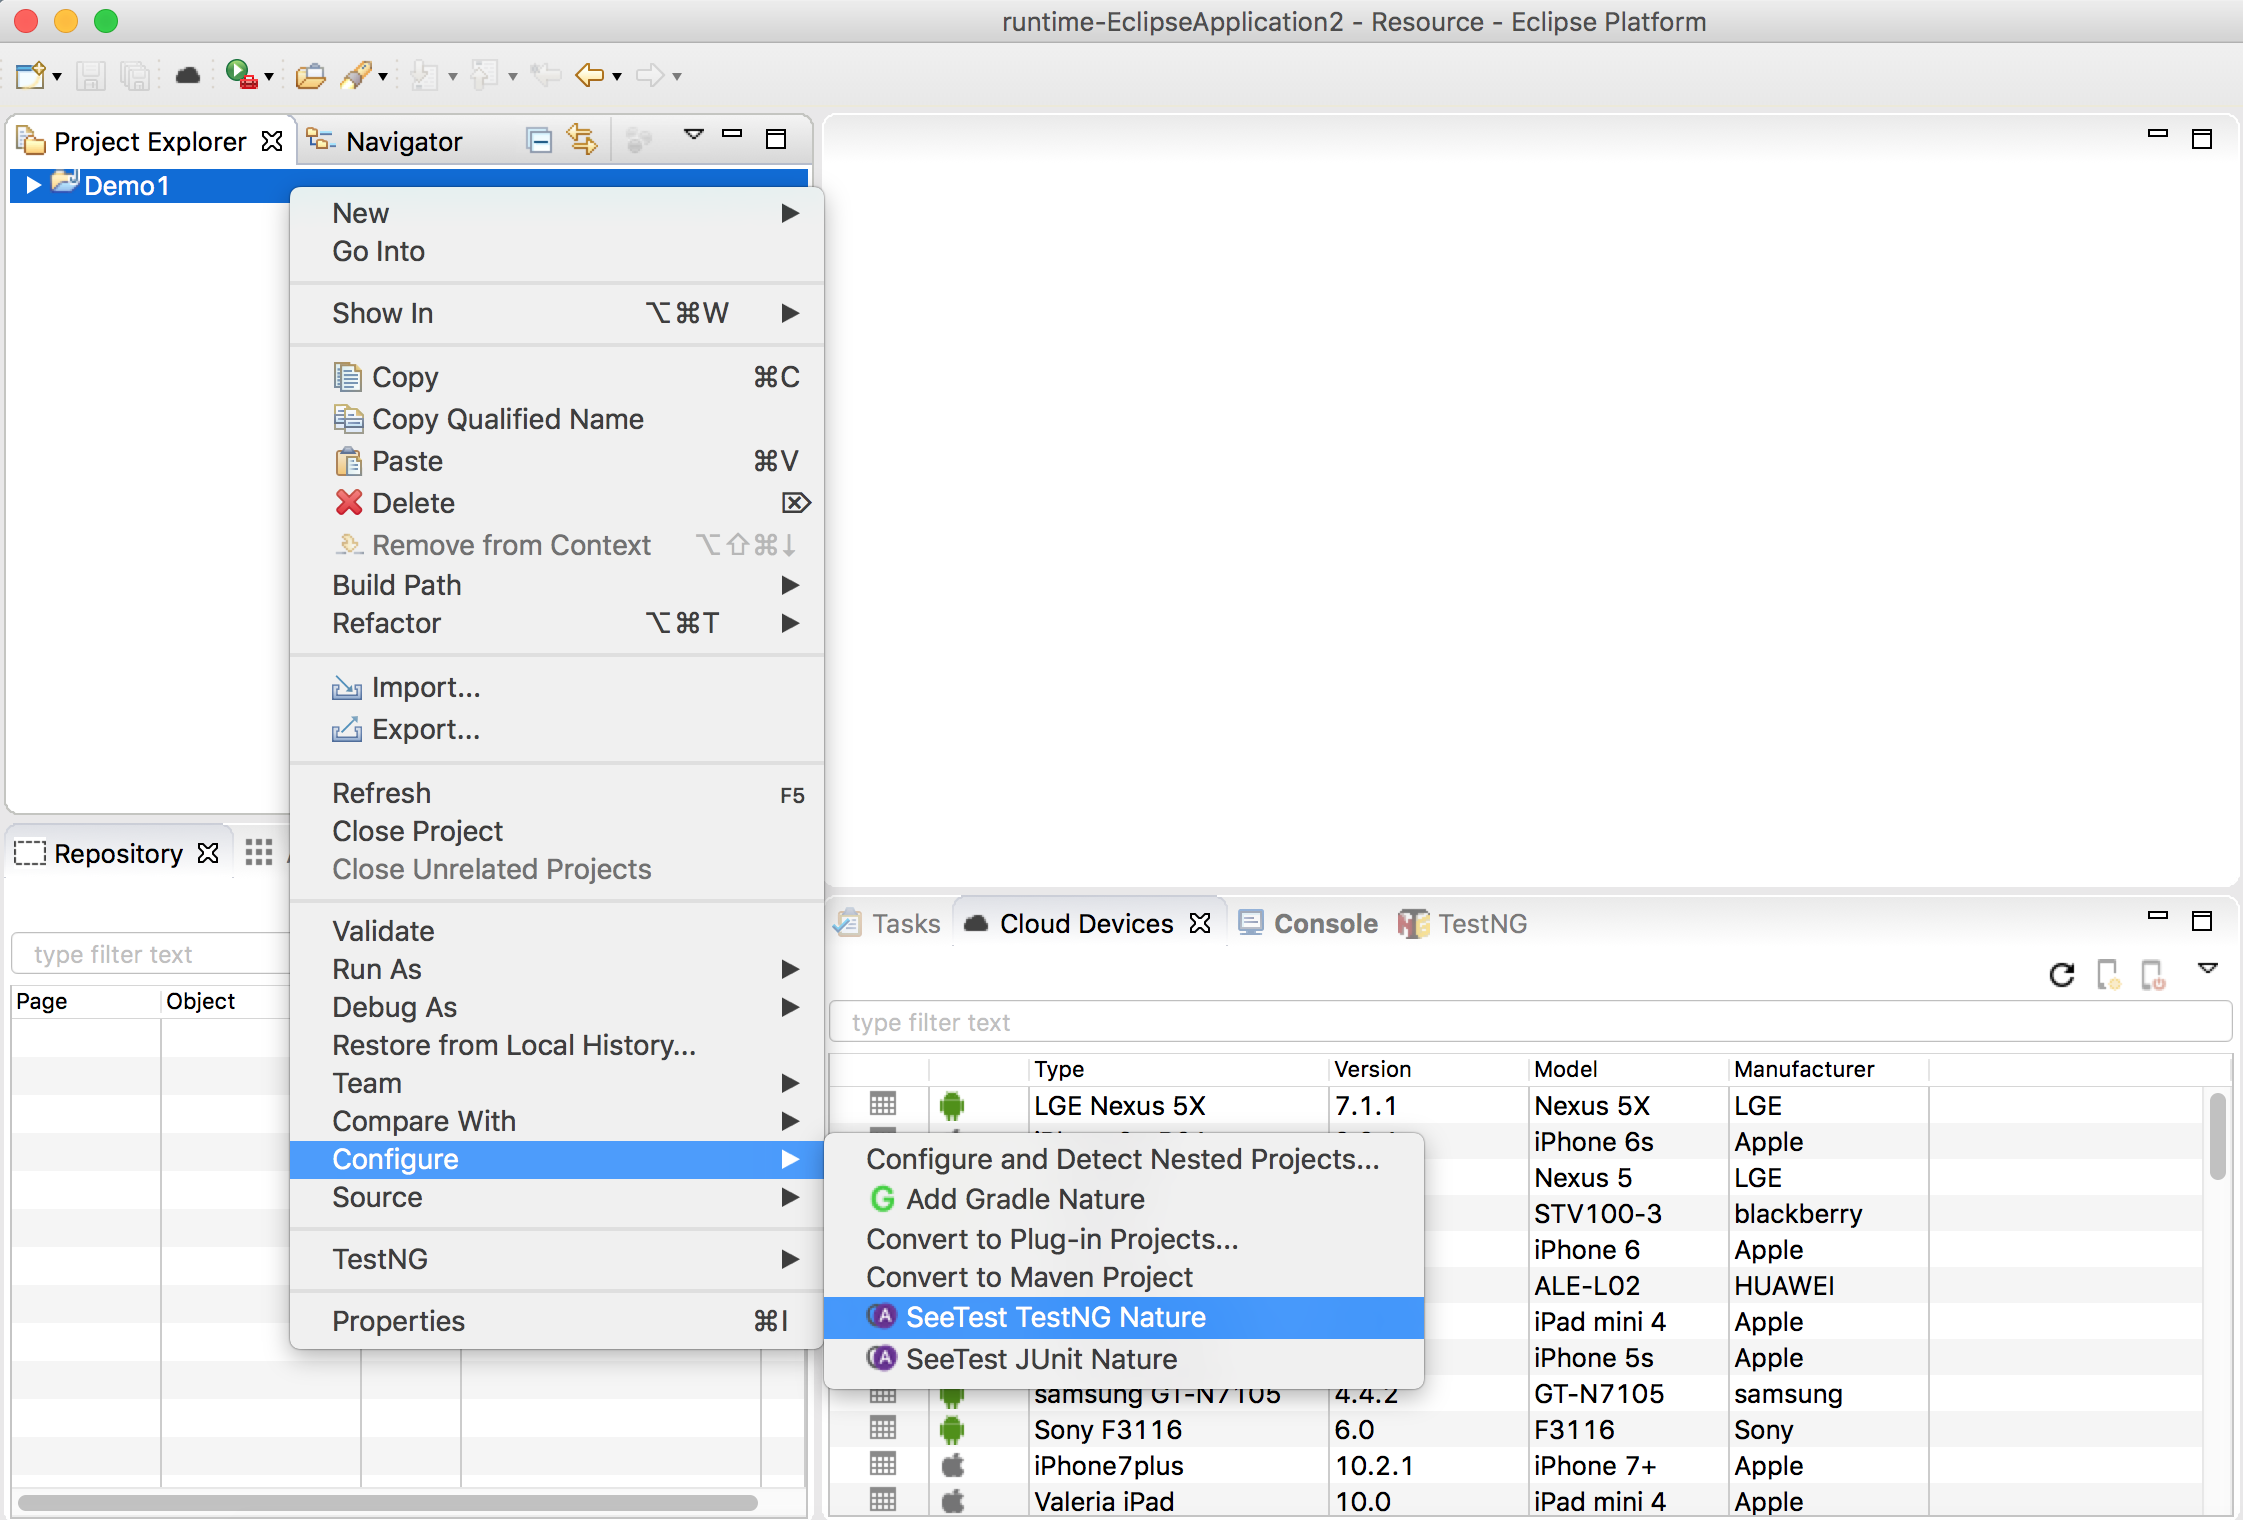
- Right-click on the Java project, select 'Configuration' then select 'SeeTest TestNG Nature' or 'SeeTest JUnit Nature'.
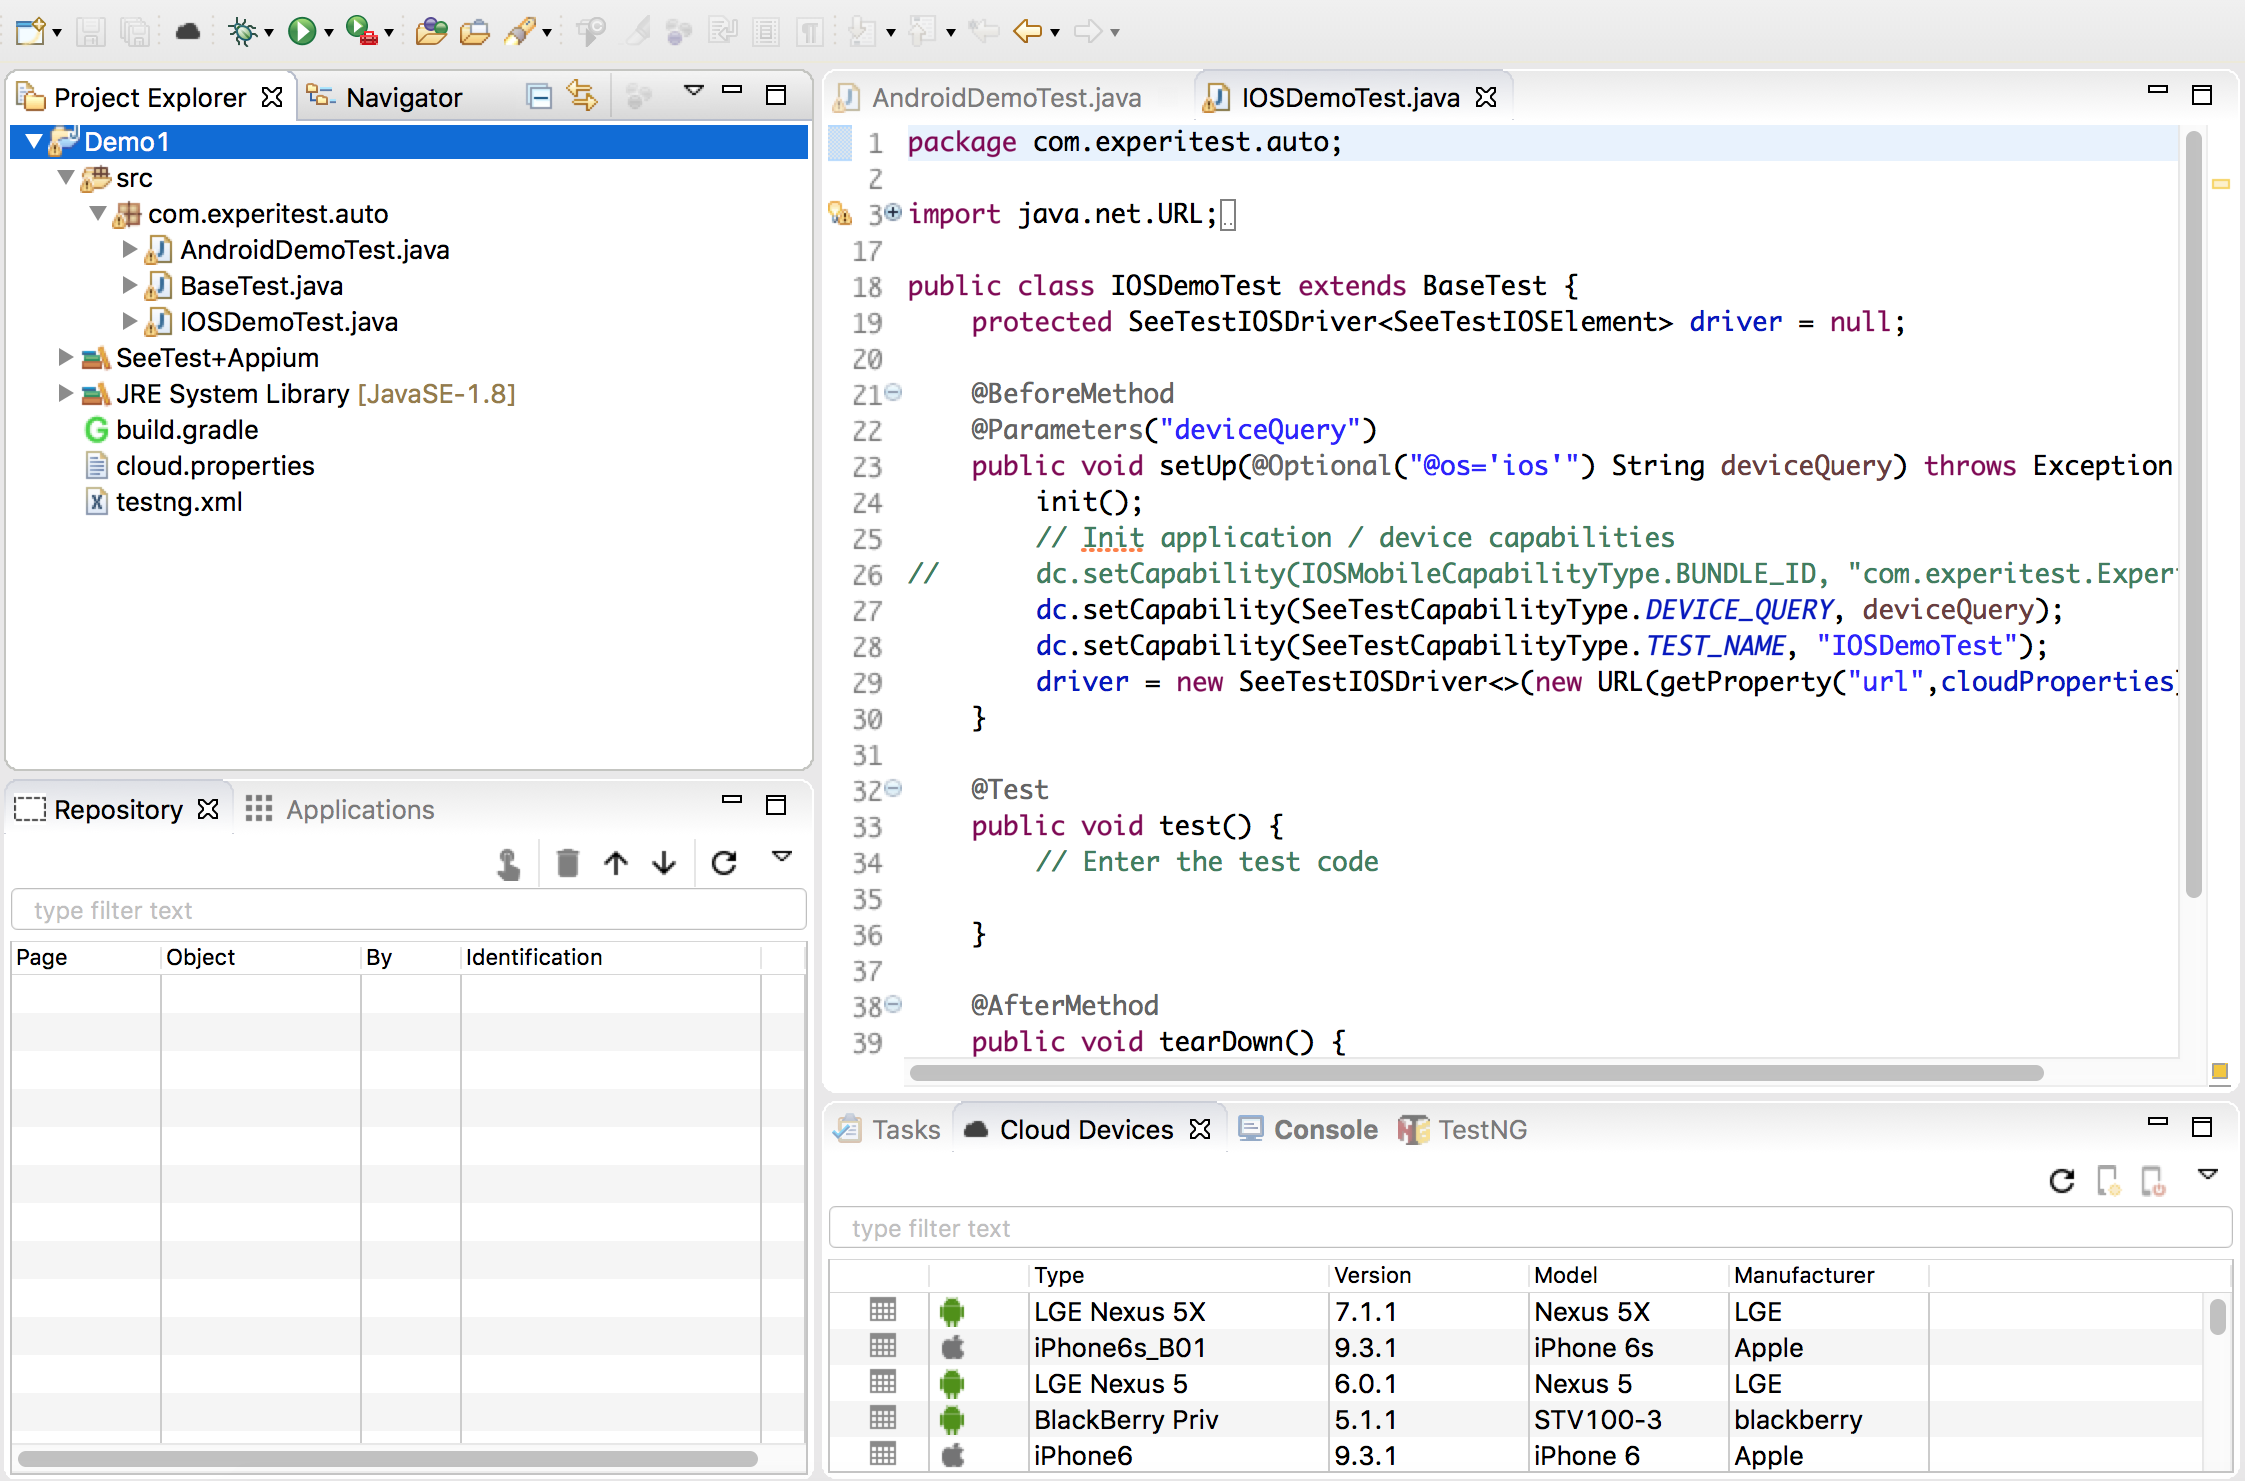
Once the configuration is applied your project should look like the following:
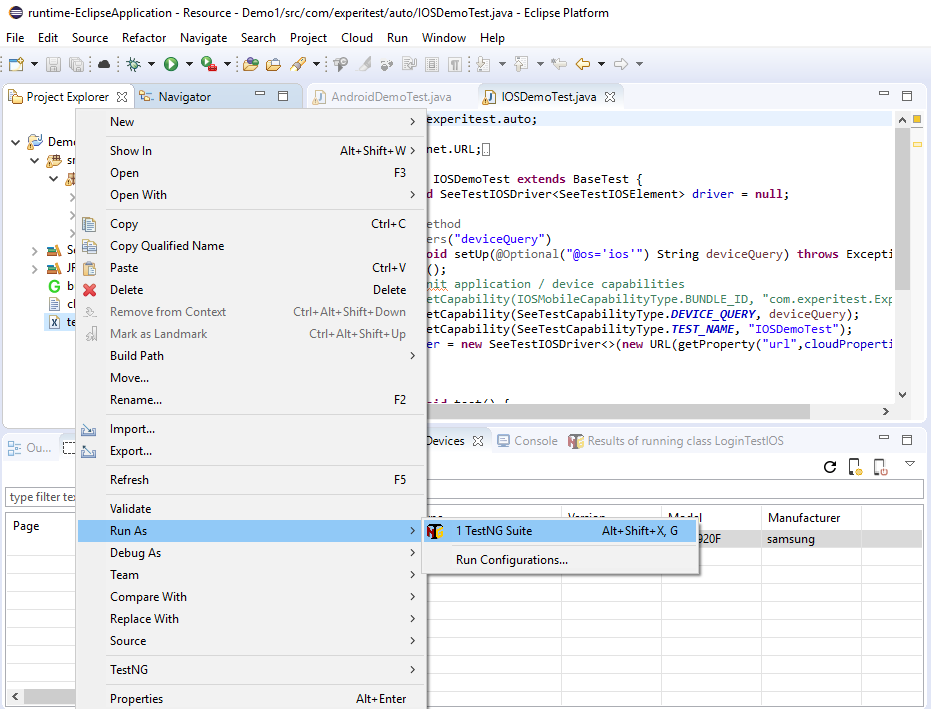
To verify your environment configuration (TestNG) right click on the 'testng.xml' and execute it. It will execute both the AndroidDemoTest as well as the IOSDemoTest in parallel.
Note about the cloud.properties file. The cloud.properties file hold the information needed to connect to the server during runtime. It is standard Java properties file:
#Mon Sep 04 12:59:25 IDT 2017 url=https\://cloud.seetest.io:443 accessKey=eyc..dfQ.eyJ..In0.q2k9..O6zs project=Project I username=user1
In the example above the cloud.properties file directs the execution to URL https://cloud.seetest.io under user user1
The authentication is performed using accessKey The current access key is retrieved automatically but in case your credentials are changed or you create new access key, you need to update this file in order to be able to execute the tests in the project.
Please see more information about using access key here.
