In this section, we will explain how to connect physical Android and iOS mobile devices to Appium Studio.
USB recommendations:
- Verify you that you do not have Samsung Kies or HTC Sync installed on your machine.
- Use the original device cables.
- If you are working with a Desktop, use the backports (directly from the motherboard).
- When you disconnect a device disconnect it with the USB cable. (the number of times you can connect and disconnect a device from the USB port is limited).
- Do not use USB V3.0 ports.
- If you need to use a USB hub, we recommend that you use Plugable USB 2.0 7 Port http://plugable.com/products/usb2-hub7bc/
- Use the latest version of iTunes.
1) Connect an iOS device to Appium Studio
With Appium Studio you can fully control the iOS application being tested as well as the device's springboard. Controlling the device's springboard enables actions such as: Changing device settings, Interacting with a non-instrumented application (like SMS, Contacts, Dialer…), launch and kill, application life-cycle.
Note: If your only requirement is to test your application (without controlling the device springboard), you can follow the simple one-step connectivity process described as Option B below.
To connect an iOS device so that you can both test applications as well as control the device's springboard:
Step 1: Prerequisites
- Install iTunes onto your computer (while Appium Studio is closed so the USB drivers can update)
- Connect the device via USB to your computer.
Step 2: In Appium Studio go to Device Manager and click the Add Device icon and select iOS Device.
Step 3: In the dialog box now displayed, activate the Enable 'Full Control' mode checkbox.
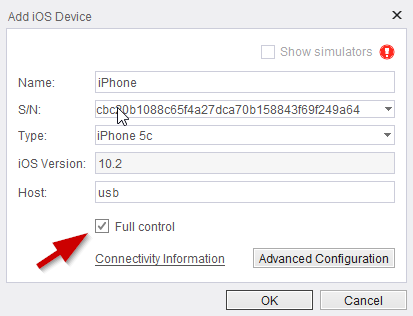
Step 4: Having selected the checkbox above, the following announcement will appear. Click Configure Profile.

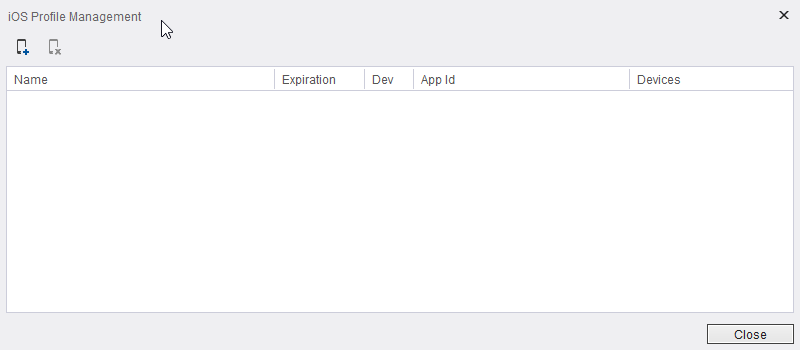
Step 5: In this dialog, you will be able to view all the configured provision profiles you have and the devices they hold in them:
Download the free Appium Studio Community Edition
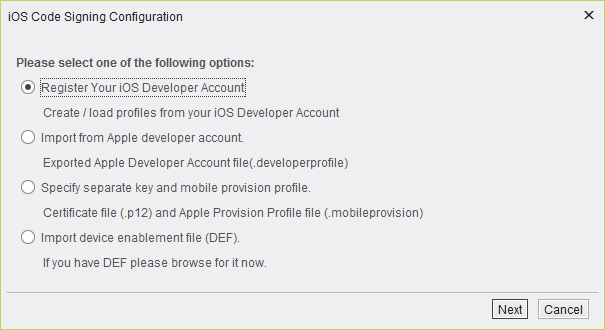
Step 6: Clicking on the "Import" button will open the following window and now follow the steps on iOS sign configuration page:
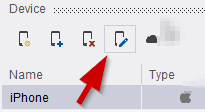
Step 7: In Device Manager, select the device which you initially connected at the start of this procedure and click the Edit Device icon.
Step 8: In the Modify iOS Device dialog box now displayed, verify that the:
- Type of the device is correct
- Host featured is USB
- Enable 'Full Control' checkbox is selected
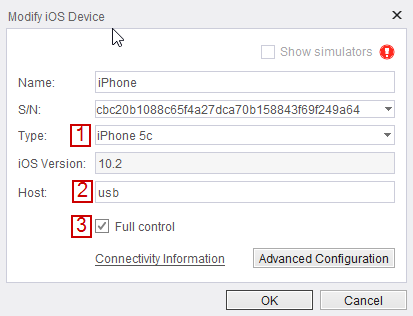 Note: If a profile is already configured to the device, the checkbox will be enabled by default.
Step 9: Click OK. The device is now available on the Device List and has the status of Ready.
Step 10: To open the device reflection on your computer's screen, click the Open Device button.
2) Connect an Android Device to Appium Studio
- The USB driver for your device should be installed on the user machine.
- Each manufacturer has its own USB drivers. The following link provides links to the websites for several original equipment manufacturers (OEMs), where you can download the appropriate USB driver for your device.
- http://developer.android.com/tools/extras/oem-usb.html
- If multiple devices connected, they should have serial numbers (SN). Otherwise, Appium Studio will identify only a single device. In general, each device has a unique SN, but in some cases, devices might have same SN (for example 123456).
- The device should be “USB debugging” enabled.
Download the free Appium Studio Community Edition
Enable USB Debugging
On devices, which are version 4 and lower, to enable “USB Debugging”, go to Settings->Applications->Development and set the "USB debugging" to enable.
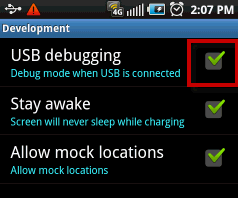
On devices, which are version 4.2 and higher, to enable “USB Debugging” follow these steps:
- Settings > About Phone > Build number > Tap it 7 times to become developer
- Settings > Developer Options > USB Debugging
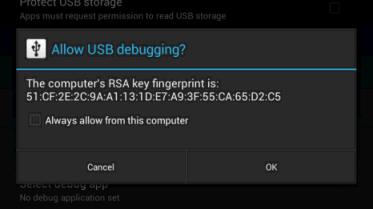
Click 'OK' when the 'Allow USB debugging' pop-up shows up, after connecting the USB cable.
Add the device to Appium Studio.
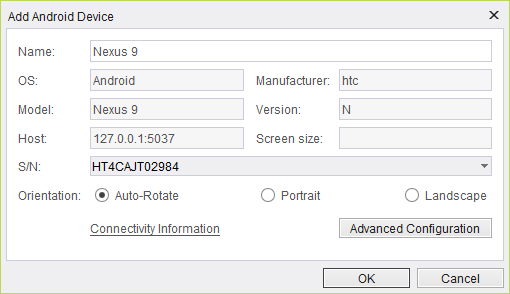
In Appium Studio go to Device tab. Click the Add Device icon and select Android from the drop-down list.
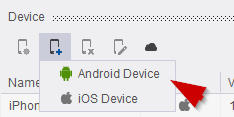
If no Android device is detected, a pop-up window will appear offering several USB drivers links for download.
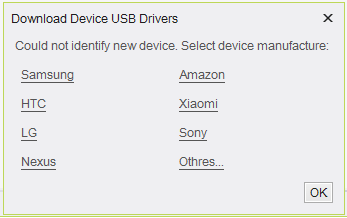
Once the USB driver is installed, repeat step (1). A pop-up will appear and you will then see the serial number of the Android device.
You can choose in which orientation the device will be open:
- Auto-Rotate - the device will open according to its real condition and orientation will change automatically if you move the device
- Portrait
- Landscape
Name the device, and then click on the "OK" button.
The selected device will appear in the "Device" list.
Open Device
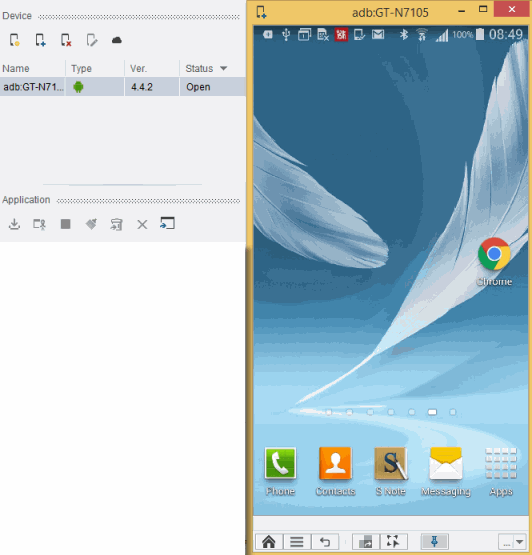
Select the device and click the Open Device icon (check that its status changes from Ready to Open).
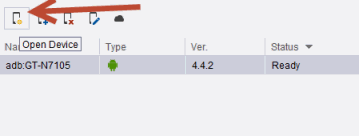
The device's reflection should then appear on your desktop.
