- Home
- Appium Studio
- Create an Appium test for Android App
- Appium Studio Tutorial
- Appium Studio: Getting Started
- Installation and SetUp
- Connecting real iOS & Android Device to Appium Studio
- Connecting Emulators or Simulators to Appium Studio
- Preparing Applications For Appium Testing
- Create an Appium test for Android App
- Create an Appium test iOS App
- Use the Object Spy & XPath to create Appium tests
- Integrate Appium Studio with your IDE to run your Appium tests
- How to run large-scale parallel execution of Appium tests
- Appium Studio For Eclipse
- Appium Studio for Eclipse
- Appium Studio for Eclipse - Installation and device connection
- Appium Studio for Eclipse - Create new Project
- Appium Studio for Eclipse - Install your application
- Appium Studio for Eclipse - Creating an Appium Test
- Appium Studio for Eclipse - Run and verify your test code
- Appium Studio for Eclipse - Run your Appium tests in parallel
Create an Appium test for Android App
Creating Test Overview
Installing app and Creating Test Demo
Download the free Appium Studio Community Edition
1. Connect an Android device
See instructions on how to connect Android devices here: Connecting Android Devices
2. Approve the Android Add Dialog
3. Open the device
Double click on the added device or click on the 'Open' icon. A device reflection should be opened.
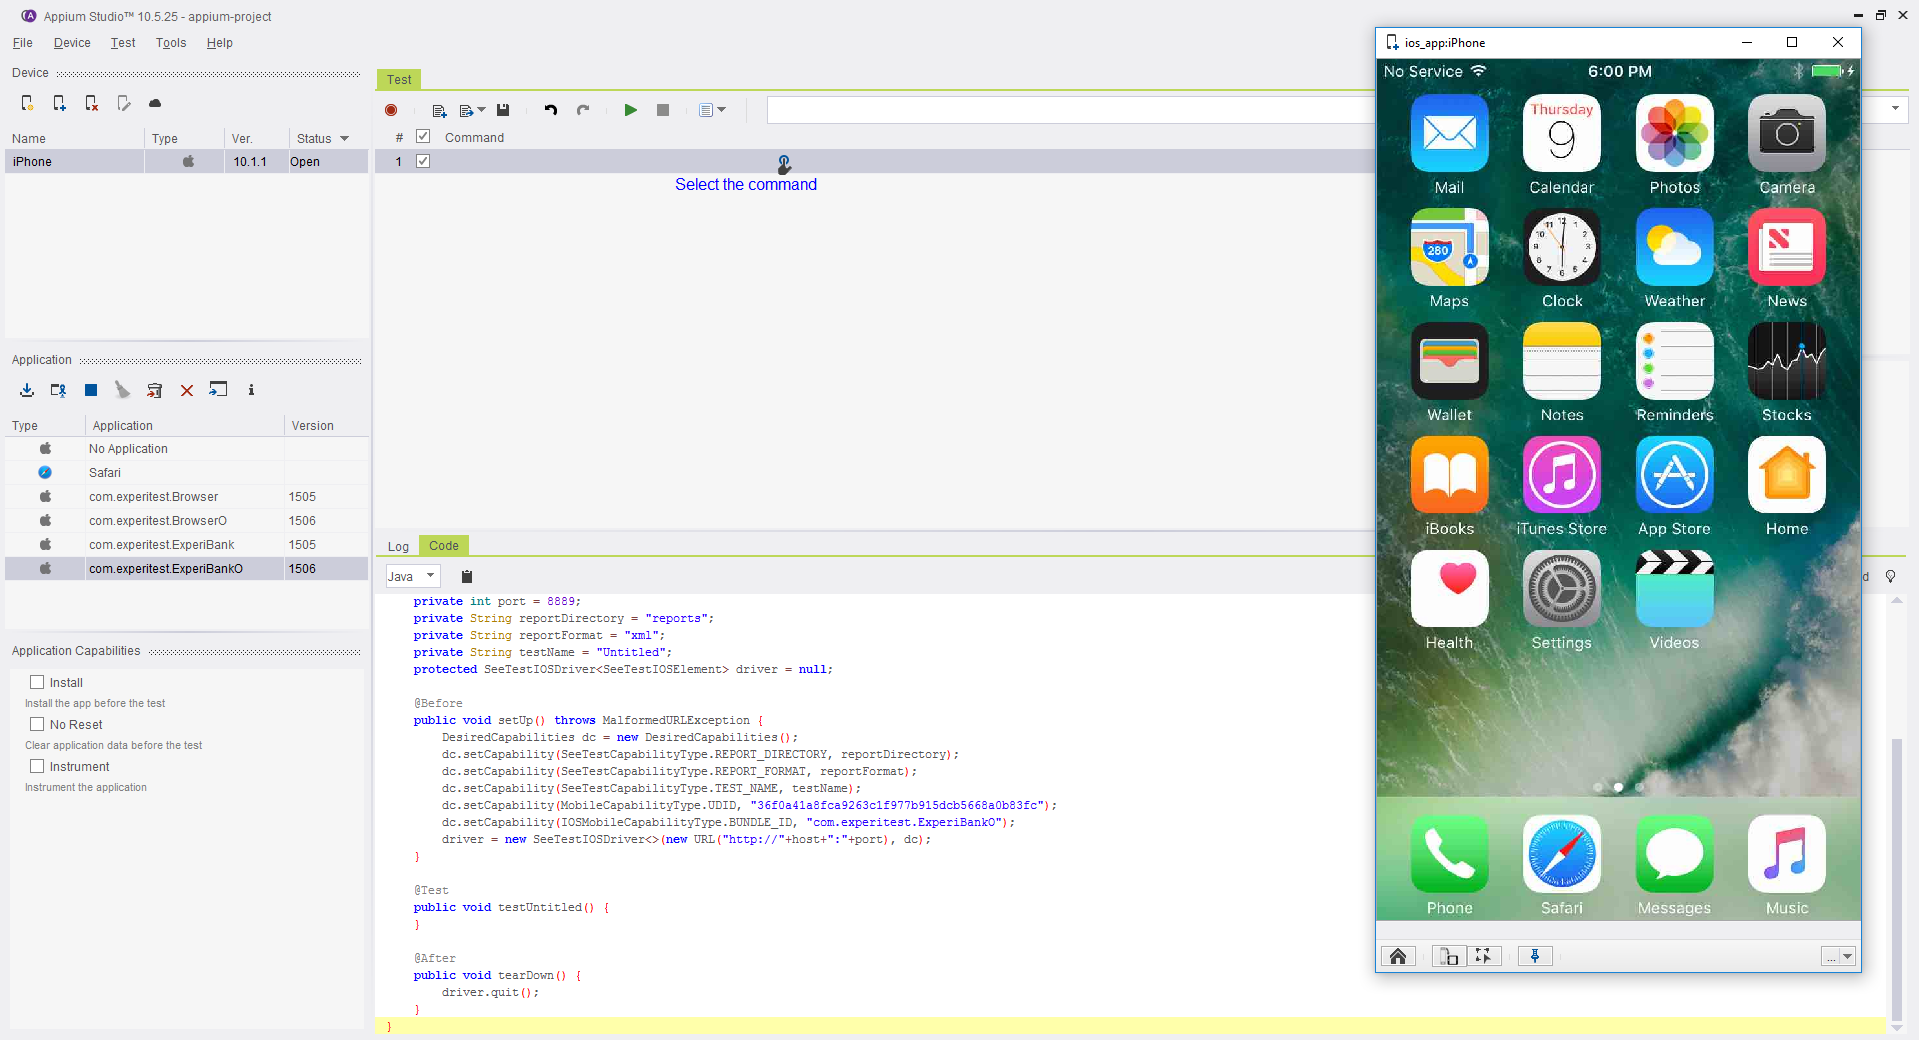
Once a device is 'open' a device reflection is available. You can use this reflection screen to control the device.
4. Import Android Application for testing
To select your application click on 'Import' icon. Select your APK/IPA/APP file. Your application will be added to the application repository.
You can also use the EriBank demo application, available in the application repository.
Select the application you would like to work with.
Select capabilities
Once a device and an application are selected you can select another capability, that will set your test/application lifecycle.
The selected capabilities will affect 1. Recording, 2. Code generation, 3. Execution within the studio.
5. Record your Appium test
Click on the 'Record' button.
Wait for the device to be prepared for recording.
Start to perform the operations on the device reflection screen.
Use your mouse to simulate touch and swipe actions, and your keyboard to send keys.
It is recommended to end your recording on the same page you have started the recording. It will enable easily cycled execution when you debug your script.
After you stop the recording the script is generated in the studio test tab.
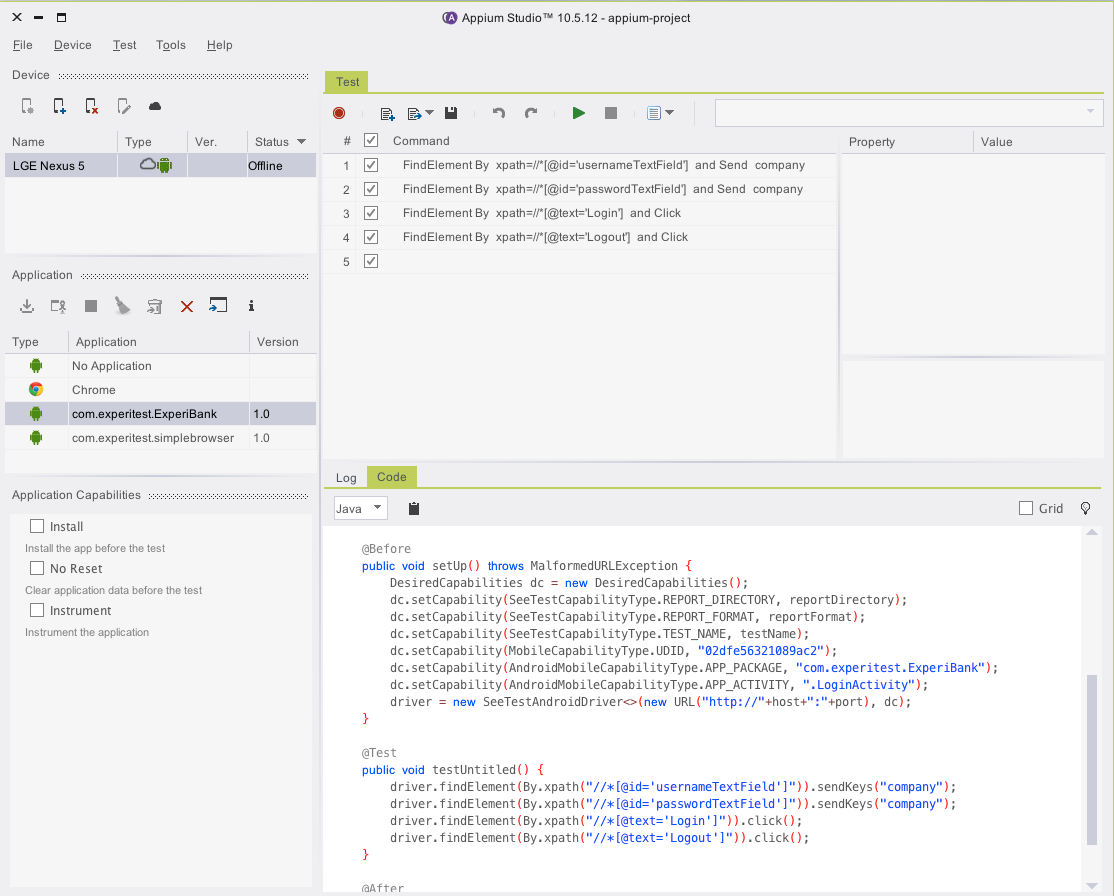
You can add new commands and modify the existing commands and commands parameters.
You can verify your recording is valid by executing the recorded script. Just click on the 'Play' button.


