In the previous tutorial, we talked about how to make changes in the local repository and pushing them to the remote repository. This post will help us learn How to verify Committed Changes on Github at the remote repository. If you have not gone through the git push tutorial, it is highly recommended to give it a read first. Continuing, as we have pushed the changes to Github (Remote repository), now let us see how we can verify those changes directly in Github. To summarise, this tutorial will cover the following topics:
- Verifying the committed changes on GitHub repository
Verify Committed Changes on GitHub
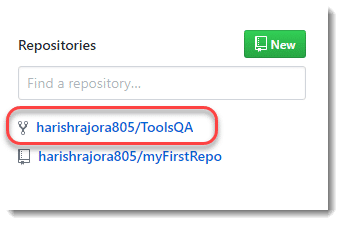
To check the changes on GitHub, the users need to navigate to the GitHub repository on which they performed the change in the git push tutorial. For this, first of all, sign in to the GitHub account.
Navigate to the repository page through the side panel available for quick navigation.
You can notice two things in the GitHub repository page as shown in the image below:

- Time Of Commit (Latest Commit 285f559 2 days ago): The latest commit is shown as "2 days ago", which shows that the commit was pushed by the user two days ago. Also, it shows the hash value of the commit (285f559). If you would have gone through the Git Log tutorial, you will be familiar with it and would notice that this is the shorter version of the actual hash value. Validate this by matching the hash value you got in the Git Bash while pushing the changes.
- Commit Message (Clone Web Page Modified): This is the commit message with which the user committed the changes. You would get your message on this page. To know more about the commit messages and how to write them, the article Writing Good Commit Messages would help.
Even though it's enough to confirm the synchronization of the changes with the GitHub account; to get more information, the user can also go through the commits tab on the same repository page.

Commits tab will show the entire history of commits that have happened on this repository.
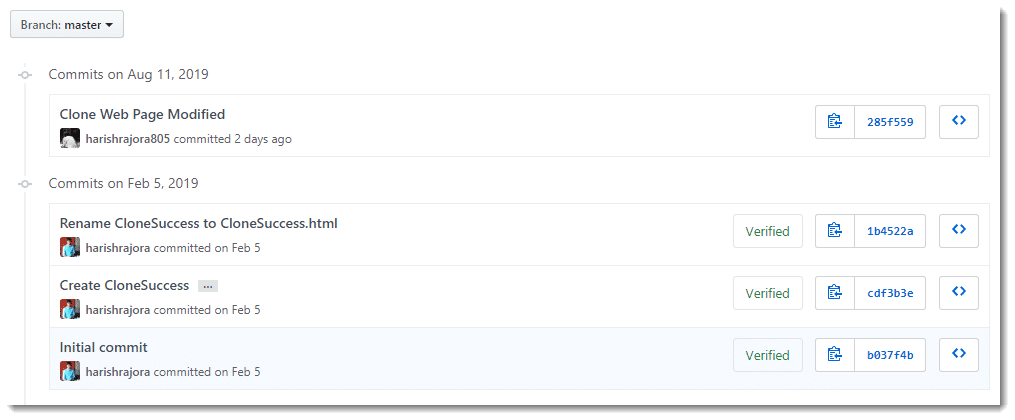
Each commit block will contain a lot of information and links that can be accessed to attain more information about the repository and that particular commit. Let's explore one block (topmost) to know about it.
 Following are the crucial steps marked in the above screenshot:
1. Commit Message: The headline of the block will contain the commit message that the user used while committing the changes in the Git.
2. Copy Hash Value to Clipboard: This icon represents the action of copying something to the clipboard. In GitHub, pressing this icon will copy the hash code of the commit on to the clipboard.
3. Hash Code of the Commit: This block is about the hash code of the commit. It is the compressed version of the actual hash code. The same code copies when you press the copy to clipboard icon but in original and expanded form.
Pressing the hash code will navigate the user to the files changed under the commit:
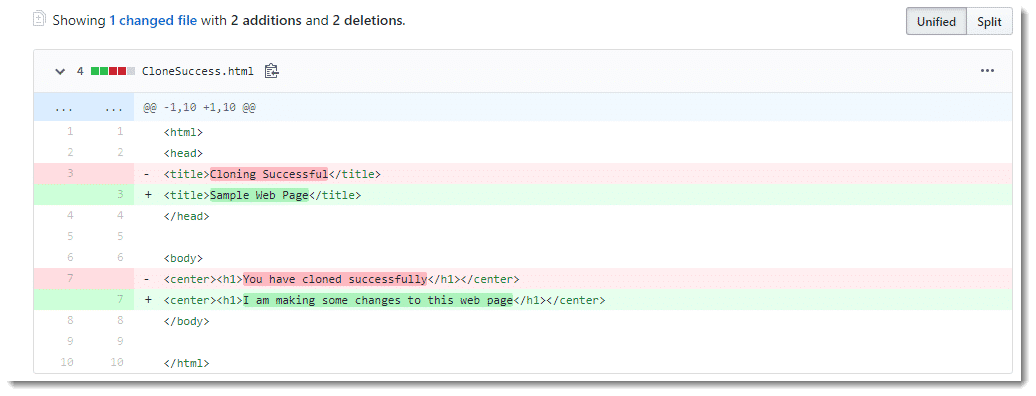
This page will show the changes that perform during the commit, i.e., the before and after changes. The pink line in the above image shows the deleted line. One can spot it by (-) sign beside the line. Similarly, the lines added have a (+) sign.
The user can also check the URL of this web page. It would be similar to github.com/repository_name/hash_code_value in the generalized form. That's why the hash code is so important. If the user has a hash code, navigation to any commit on GitHub is straightforward.
4. Check History: This button will help the user to check the history of the repository till that point of time when the performance of this commit takes place. So, if we click this button on any previous commit blocks, this commit will not be shown since it happened after that commit. The user will be able to see the state of the repository only till that point of time.
Next, select the history button:
 It will take the user to the repository home page when that particular commit would have happened and showing the same values of commit message and hash code etc. By this, we are sure about the changes that we have made are reflected in the GitHub account.
To conclude, we are clear about all the different ways of how a user can validate all the changes pushed to the remote repository on the GitHub account. We will now move on to the next tutorial on Git.
