In Web test automation, locator is the only way to identify an element on a Web page when running test scripts. When it comes to automated testing of Web applications, choosing a suitable strategy is essential. Web element locators depend entirely on the implementation process, so there is no one-size-fits-all approach for every Web applications. The selection strategy can be influenced by these factors: Web application frameworks, development conventions, software life cycles, and the experience of automation leaders.
Picking a suitable strategy is crucial not only to Selenium but also to Katalon Studio. Katalon Studio provides features to generate necessary locators (XPath, CSS, etc.); so that users only need to choose the correct one to use. In other words, Katalon Studio has done 80% of the task, and the remaining 20% will be decided by users. Starting a project with a good strategy will make test projects stable and scalable, as well as reduce effort at the maintenance phase. This tutorial will help you fulfill this expectation.
There are many different types of Web element with the most common including Label, Textbox, Button, Select, Hyperlink, Checkbox and Radio button. Custom elements built from other basic elements are Frame, Dialog, Dropdown, Calendar, and Form.
To identify these elements, we can follow one of these strategies.
- Simple locators: id, name, class, tag, link text, attribute
- Advanced locators by combining the simple locators above:
- XPath
- CSS
- Using functions in XPath:
- contains
- sibling
- ancestor
This tutorial will help your team choose an appropriate approach for Web element locators.
Understanding Your Application Under Test (AUT)
This step contributes up to 80% of your success in choosing an excellent approach to UI functional automation testing. Before performing any automation testing, your team has to answer these questions:
- Which web technologies are in use?
- Which conventions are applied by the development team?
The answers to these questions will help you decide which locator value is static or dynamic. Take ID, for example. ID is generally suggested as the best locator in Web UI testing because it is simple and unique on a web page. However, there is a problem if it is generated dynamically at runtime. Different Web technologies have different default settings when rendering elements on a web page. For example, ExtJs or Angular frameworks regularly create dynamic element IDs by default. Therefore, if your AUT is developed using these technologies, you can expect that IDs are dynamic and that they should not be used as the main selectors. In this case, you should use Class, Name, or Text properties instead.
The development team’s conventions should also be taken into account. If the team has the conventions of using all elements with static IDs, static names, for example, then these static properties can be used as primary locators. Furthermore, it is unnecessary to locate an element by its static locator if it has parents, children, or siblings that can be located by static locators. You instead locate the element using XPath functions. For example:
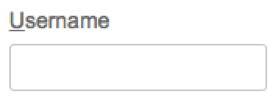
<div class="field-group">
<label accesskey="u" for="tl0156">Username</label>
<input class="text medium-field" id="tl0156" type="text">
</div>
- Locate the
<div class="field-group">- //label[.=’Username’]//ancestor::div[1]
- Locate the
- //label[.=’Username’]/following-sibling::input
Understanding Application Lifecycles
If the AUT life cycle is too short and the content is static, the absolute XPath, which can be copied from the browser, is sufficient. There is no need to find a better approach for this type of project.
However, if the AUT is large and its life cycle is long, including the maintenance phase, you have to think about the locator strategy seriously. A wrong approach may lead to wasting tremendous time and effort to update and maintain test cases.
Using Static Locators
After studying the AUT and development conventions, if you are certain that all locators for an element are static, then use them. This is the simplest possible. See example below:
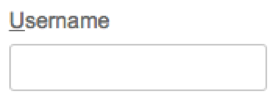
<div class="field-group">
<label accesskey="u" for="login-form-username"><u>U</u>sername</label>
<input class="text medium-field" id="login-form-username" name="os_username" type="text" value="">
</div>
You can use one of the following XPath to locate the Username textbox:
- Id
- // [@id=’login-form-username’]
- Name
- // [@name=’os_username’]
- Class
- // [@class=’text medium-field’]
- Tag
- //input[@class=’text medium-field’]
- Attribute
- //input[@class=’text medium-field’][@type=’text’]
Using Uniquely Present Text
If an element does not have any static locator, you will have to consider using combined locators. Below are a few suggestions:
Label
A label is usually used to describe a message (error message, info message, hint message, etc.), a control (textbox, radio button, text area, etc.), or a tooltip. As shown in the user interface, a label is usually unique—otherwise, it would be confusing for users to differentiate UI elements. Therefore, the label’s text is considered a good candidate of the label’s locator. To make the locator more readable, can be used to narrow the scope of the locator.
To locate a label, you should focus on: tag and text. For example:
| <div class="intro"> <h2>Welcome to Jira</h2> </div> Xpath: //h2[text()=’Welcome to Jira’] //div[.=’Welcome to Jira’] | Priority Xpath: //label[text()=’Priority’] //label[.=’Priority’] | | — | — |
Textbox
<input, type=”text”>
A textbox is normally used to receive an input from users. If there is no single static locator, you need to look for references to unique elements to locate the textbox. Oftentimes when look at a webpage, what helps us recognize the functionality of a textbox is the text next to it. This is a good tactic of how to locate the textbox.
Here are several examples of textbox:
- A textbox has a label outside and next to it. Depending on the location of the label, you can select the most suitable XPath.
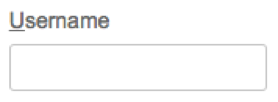
<div class="field-group">
<label accesskey="u" for="tl0156">Username</label>
<input class="text medium-field" id="tl0156" type="text">
</div>
- There are some XPath that can be used to locate the textbox
- //label[.=’Username’]/following-sibling::input
- //label[.=’Username’]//ancestor::div[1]//input
- //input[@id=//label[.=’Username’]/@for]
- Sometimes you may see some textboxes that already have text (or a placeholder) inside them:

<input data-selenium="textInput" tabindex="-1" type="text" class="SearchBoxTextEditor SearchBoxTextEditor--autocomplete" placeholder="Enter a destination or property" value="">
Use the ‘placeholder’ attribute in an XPath to locate the textbox as
- //input[@placeholder=’Enter a destination or property’]
- Notes
- Pay attention to the ‘placeholder’ attribute. It may be dynamic as well. The Search bar of Airbnb’s website is an example:

In this case, use Tag or texts next to the textbox.
Button
A button is normally used to receive an action from users such as hover, click, and double-click. Similar to a textbox, a button is often recognized by its text. Here are some typical examples of buttons in a web page:

<input accesskey="s" class="aui-button aui-button-primary" type="submit" value="Create">
The text in this button is from the ‘value’ attribute. So the XPath should be:
- //input[@value=’Create’]
Sometimes, the text in the button is not from the ‘value’ attribute. It is actually a text or label with the format that makes it look like a button.

<button type="submit" class="_1ptkf58d" aria-busy="false" data-veloute="book-it-footer-trigger">
<span class="_cgr7tc7">
<small class="_1pqj8ky3">
<div class="_1283fq">
<span>Book

</div>
</small>

</button>
- The following XPaths will help to locate the button. You can use one of them.
- //span[text()=’Book’]//ancestor::button[1]
- //button[.//span[text()=’Book’]]
- //button[.=’Book’]
Select
A Select (or Drop-down list) allows you select an item from a list of defined items. Normally, the locator of a select is similar to that of a textbox—the difference is on the tag: it uses ‘select’ tag instead of ‘input’.

<label for="tl0023">Priority</label>
<select class="select aui-ss-select" id="tl0023" multiple="multiple">
<option class="imagebacked" value="10000">Blocker</option>
<option class="imagebacked" value="1">Highest</option>
<option class="imagebacked" value="2">High</option>
<option class="imagebacked" value="3">Medium</option>
<option class="imagebacked" value="4">Low</option>
</select>
The following XPaths can be used to locate the select element above:
- //Select[@id=//label[.=”Priority”]/@for]
- //Select[.//option[.=”Highest”]]
- //option[.=”Highest”]//ancestor::Select[1]
Hyperlink
A hyperlink is a link on a webpage that usually receives the ‘click’ action. A hyperlink is displayed as a text with or without an underline, in a different color. Hence, the a hyperlink’s locator is very similar to that of a text or label—except that the ‘a’ tag is used. If a hyperlink does not include text or its URL is more stable than its text, you should use the ‘href’ attribute.

<a accesskey="`" class="aui-button aui-button-link cancel" href="/secure/ForgotLoginDetails.jspa" title="Press Ctrl+Alt+` to cancel">Can't access your account?</a>
- A hyperlink is normally located by ‘href’ or the text presenting it:
- //a[@href=”/secure/ForgotLoginDetails.jspa”]
- //a[.=”Can’t access your account?”]
Checkbox
With the tag ‘input’, a checkbox is used to receive the “click” action. Normally, a checkbox locator is similar to that of a textbox.

<div class="input-list-item input-list-item-checkbox">
<input type="checkbox" class="sm-input sm-input--stretch" id="tl0056" name="remember_me">
<label class="sm-label" for="tl0056">Remember me</label>
</div>
A checkbox is often associated with a label. So we can use the label to locate the checkbox:
- //label[.=’Remember me’]//preceding-sibling::input[1]
- //label[.=’Remember me’]//ancestor::div[1]//input
- //input[@id=//label[.=”Remember me”]/@for]
- //input[.//following-sibling::label[.=’Remember me’]]
Radio button
A radio button, like a checkbox, is designed to receive a “click” action. Its locator is completely the same as the checkbox locator.

<form name="agreementFormjdk-8u181-oth-JPR" method="post" action="radio" class="lic_form">
<input type="radio" value="on" id="agreementjdk-8u181-oth-JPR-a" onclick="">
<label for="agreementjdk-8u181-oth-JPR-a">Accept License Agreement</label>
<input type="radio" value="on" id="agreementjdk-8u181-oth-JPR-d" onclick="">
<label for="agreementjdk-8u181-oth-JPR-d">Decline License Agreement</label>
</form>
A radio is often presented with a label on the UI. We use labels to locate a radio button as follows:
- //label[.=’Accept License Agreement’]//preceding-sibling::input[1]
- //label[.=’Accept License Agreement’]//ancestor::div[1]//input
- //input[@id=//label[.=”Decline License Agreement”]/@for]
- //input[.//following-sibling::label[.=’Decline License Agreement’]]
Summary
This article presents some strategies for locating Web elements on a webpage in different situations. These strategies reflect the user’s mindset when performing UI Automation tests: First, think about simple static locators. Then when simple methods are no longer working, gradually increase the complexity of the solution.
It is important to mention that the following principle must be held in deciding locators: the locator must be unique, readable and maintainable. If the locator does not uniquely represent the target element, technical problems will arise during the maintenance phase as there is no way to know which locator should be changed.
