This chapter explains the Set Up of Rest Assured jars in Eclipse Project or How to Configure Eclipse with Rest-Assured? To do that, follow the below steps:
- Setting up Java, Eclipse and TestNG
- Download Rest-Assured Jars
- Creating a Project in Eclipse
- Setting up Rest-Assured Jars in class Path of Eclipse
Pre-Requisites of Configure Eclipse with Rest-Assured
Let us set up our development environment to write some RESTful web services tests. In order to set up the environment, we have to follow these links below. If you already have these tools you can skip to the next section.
Once Java, Eclipse and TestNG is set up on the system, download and set up Rest-Assured in Eclipse.
Download Rest-Assured Jars/Library
First download all the required Rest-Assured jar files. Here is the link to download the Jars: https://github.com/rest-assured/rest-assured/wiki/Downloads. On this page you will find a section to download "Current direct downloads" . Move to that section and click on the link to dist package, as shown in the image below
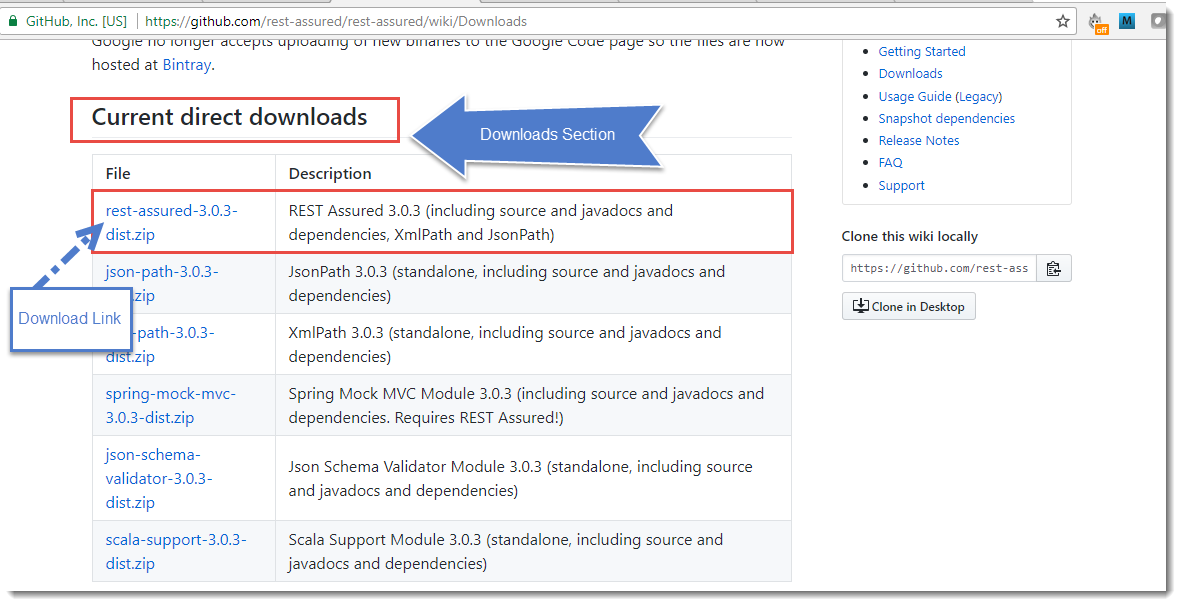
Note: At the time of this writing Version 3.0.3 is available for download.
Once click on the link, browser will download the rest-assured-3.0.3-dist.zip file on the system. For me, the file gets downloaded to the "downloads" folder. In your case, it might be a different location based on your browser's default setting. Now, go to that folder where the zip file was downloaded and simply unzip the files.
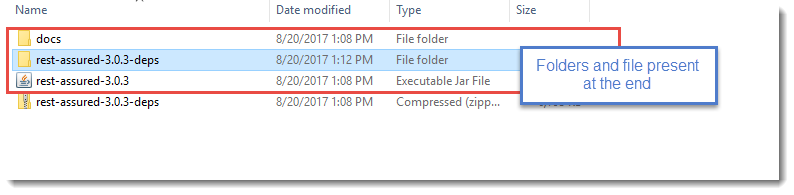
Go to the unzipped folder and open it. There should be the following folders and files inside the unzipped folder.
- docs: A folder containing javadocs
- rest-assured-3.0.3.jar: jar file containing Rest-Assured classes
- rest-assured-3.0.3-deps.zip : Another zip file containing all the dependency jars.
make sure to unzip the rest-assured-3.0.3-deps.zip dependency jars as well. At the end your folder would like this.
Creating a Project in Eclipse
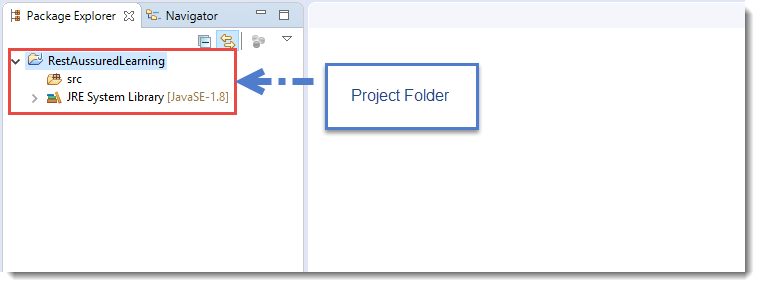
Now it is required to add the unzipped jars in the class path of Eclipse project. But before that create a Eclipse project with name RestAussuredLearning, as shown in the image below.
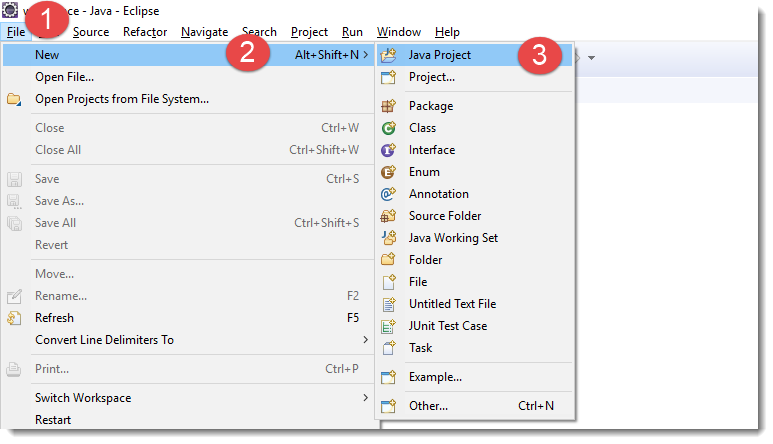
Once clicked on the Java Project link, a new project window opens up. Enter the name of the project as RestAussuredLearning and click on Finish button.

Now the project with name RestAssuredLearning should display in the package explorer.
How to Set Up Rest-Assured?
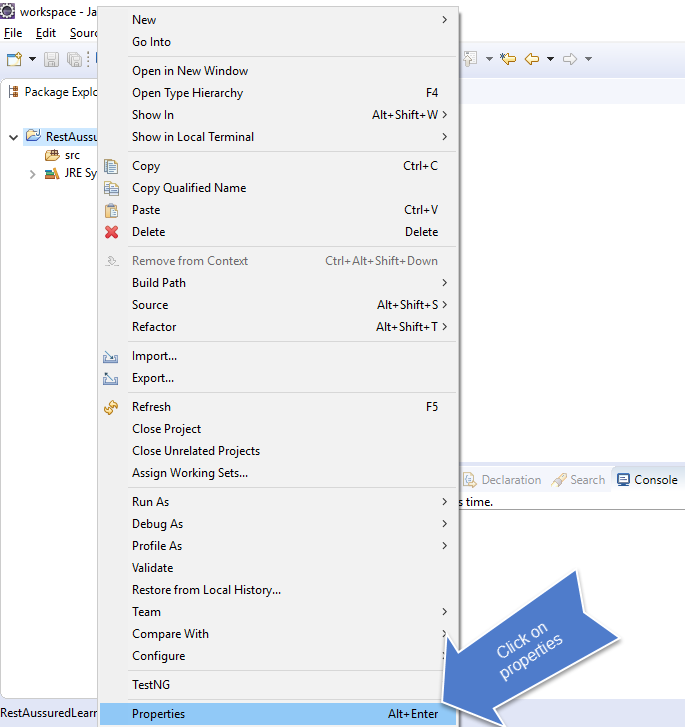
Right-click on the Java project folder in the package explorer pane and choose Properties. This will open up the Project properties pop up window.
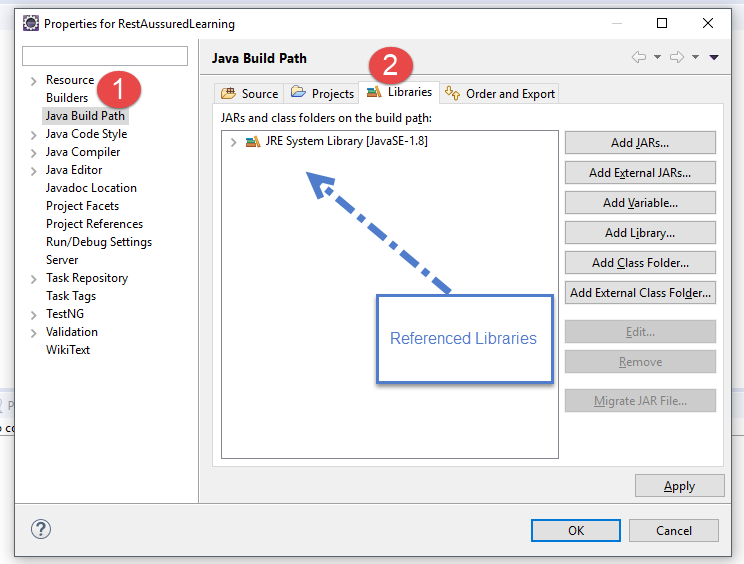
In the properties window, go to Java build path option in the left pane. In the Java build path pane, on the left hand side you will see the Libraries pane.
Now reference the jar files that we downloaded earlier. To do that click on the Add external jars button and browse to the folder where we unzipped all our Rest-Assured jars. Just like shown in the image below
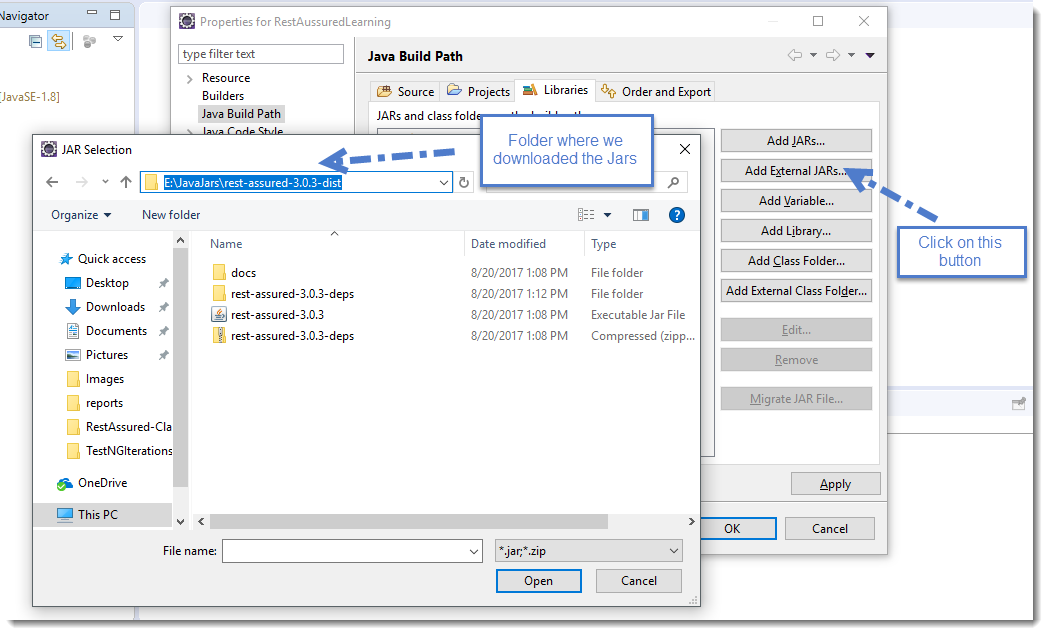
Make sure to include the following Jars
- rest-assured-3.0.3.jar
- All the jars in the folder rest-assured-3.0.3-deps
That is all have to do, we have successfully set up a Java project with Rest-Assured library.
The next tutorial will cover the first Rest-Assured based Test to verify a RESTful Web Service.