In the last tutorial, we introduced you to the TestNG framework, along with its benefits. Additionally, we also made you familiar with a few annotations used in the TestNG framework. Continuing on the same path and before moving to the hands-on experience, we need to install the software on our system. It is effortless to install TestNG in Eclipse as it comes as a plugin.
Moreover, the user just needs to have eclipse installed in their system beforehand. Please visit Download and Install Eclipse to setup Eclipse on your system. This tutorial will cover the following:
- How To Install TestNG In Eclipse?
- How To Install TestNG In IntelliJ?
- Procedure To Download TestNG Jar in IntelliJ?
- How To Set Up TestNG Jar In IntelliJ?
How To Install TestNG In Eclipse?
The following installation process uses Eclipse Version 4.14.0 as on Mar'20 to install TestNG.
-
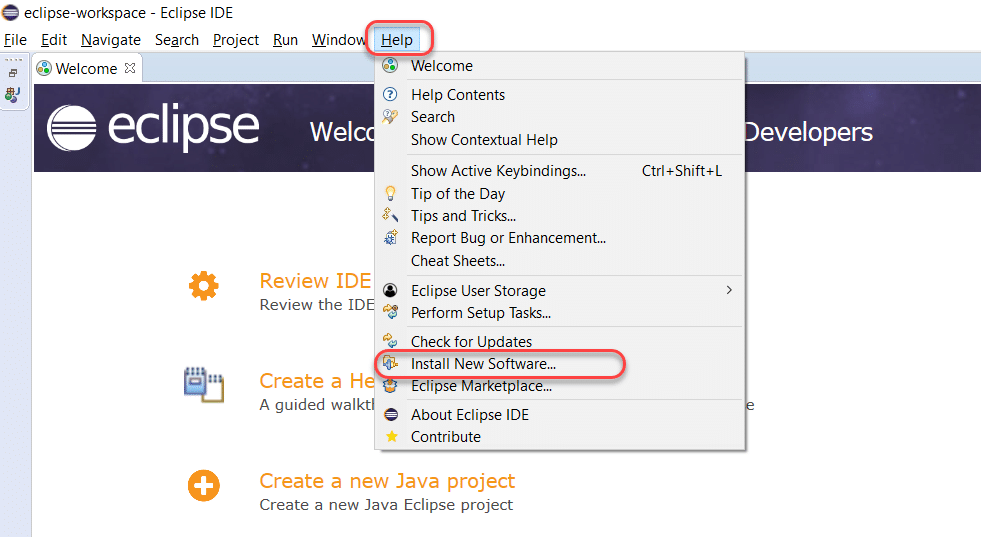
Launch the Eclipse IDE and click “Install New Software” in the Help menu.
-
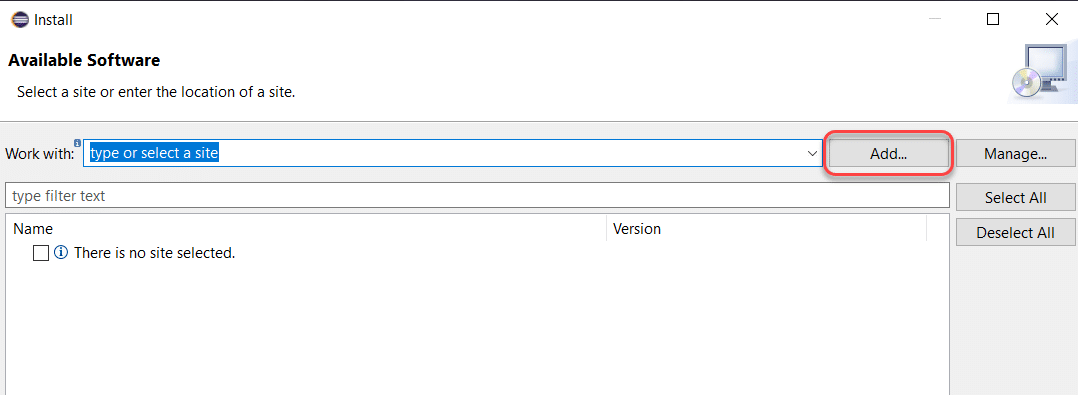
You will see a new installation dialog window, click the "Add" button.
-
Fill out the information as follows:
Name: TestNG (depends on the user)
Location: https://dl.bintray.com/testng-team/testng-eclipse-release/6.14.3/
Click Add.
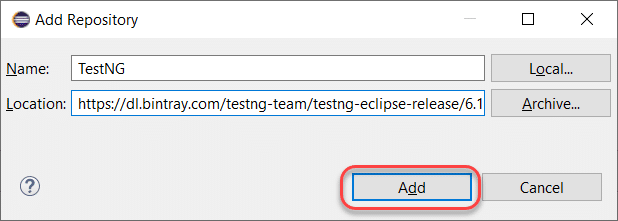
Note: For Eclipse06-18, you can install TestNG from the Eclipse Marketplace, and for 09-19, you need to follow the new link as given in this tutorial.
-
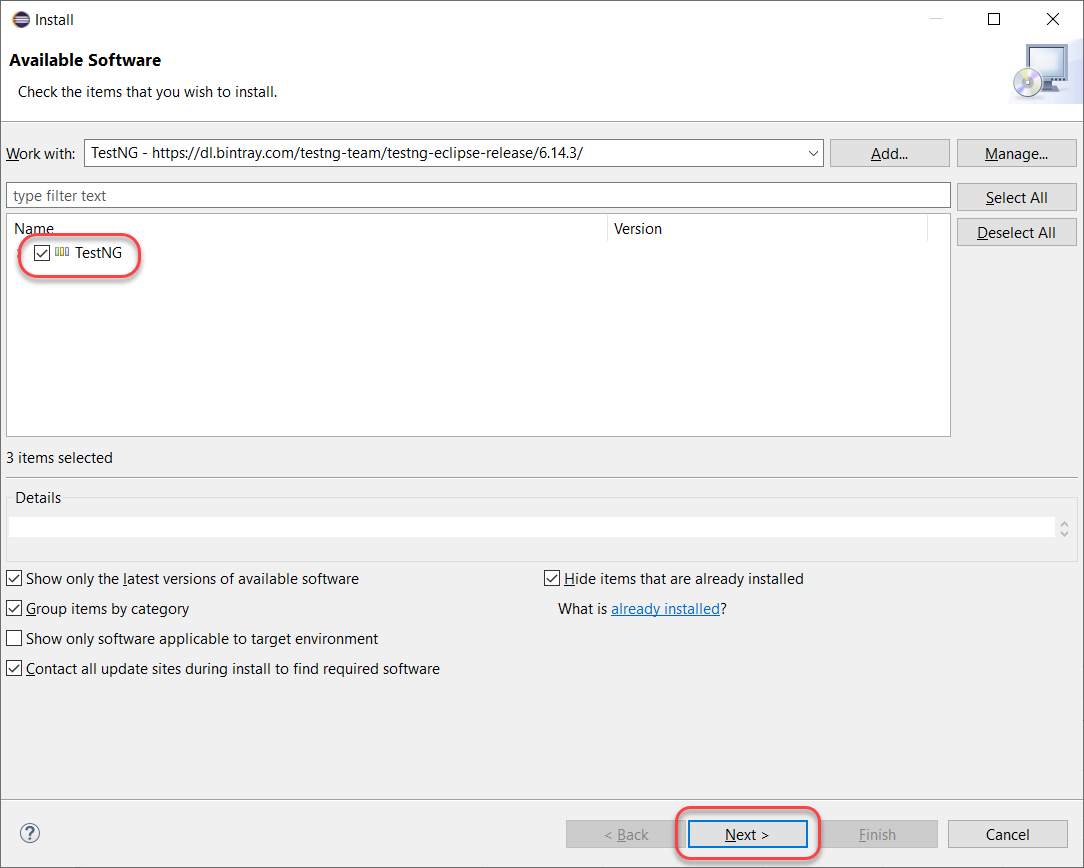
Clicking on add redirects us back to the previous window. However, this time you must see the TestNG option in the available software list. After that, check "TestNG" and click Next.
-
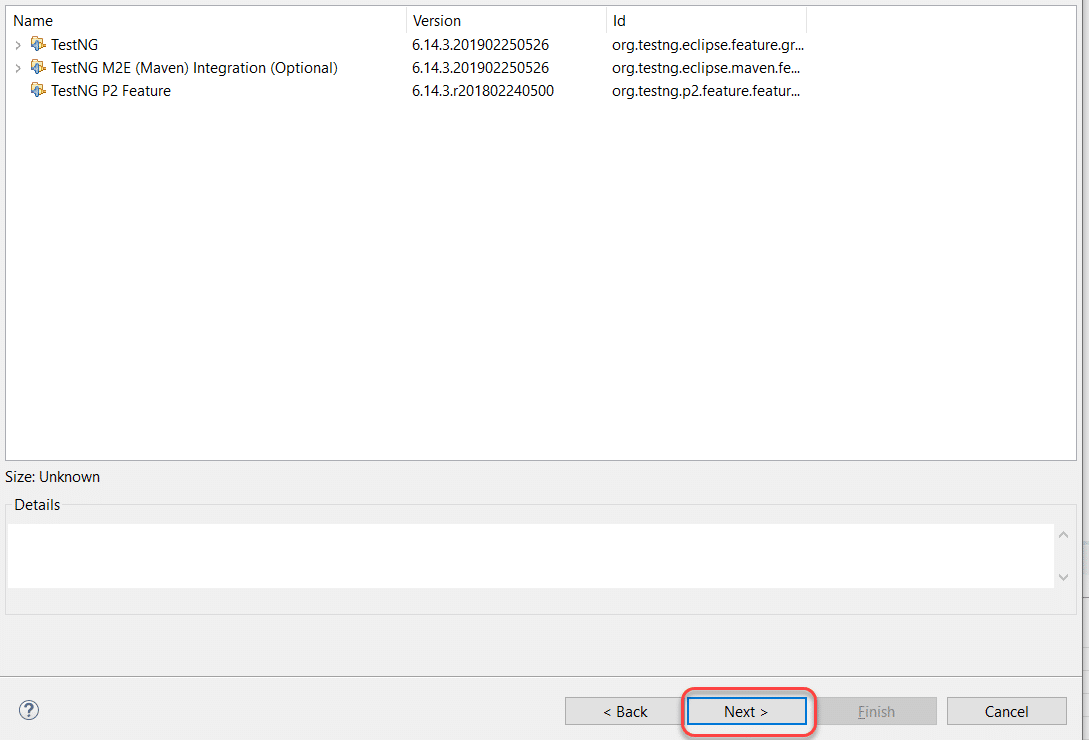
Click Next to install the TestNG dependencies that eclipse calculates by itself.
-
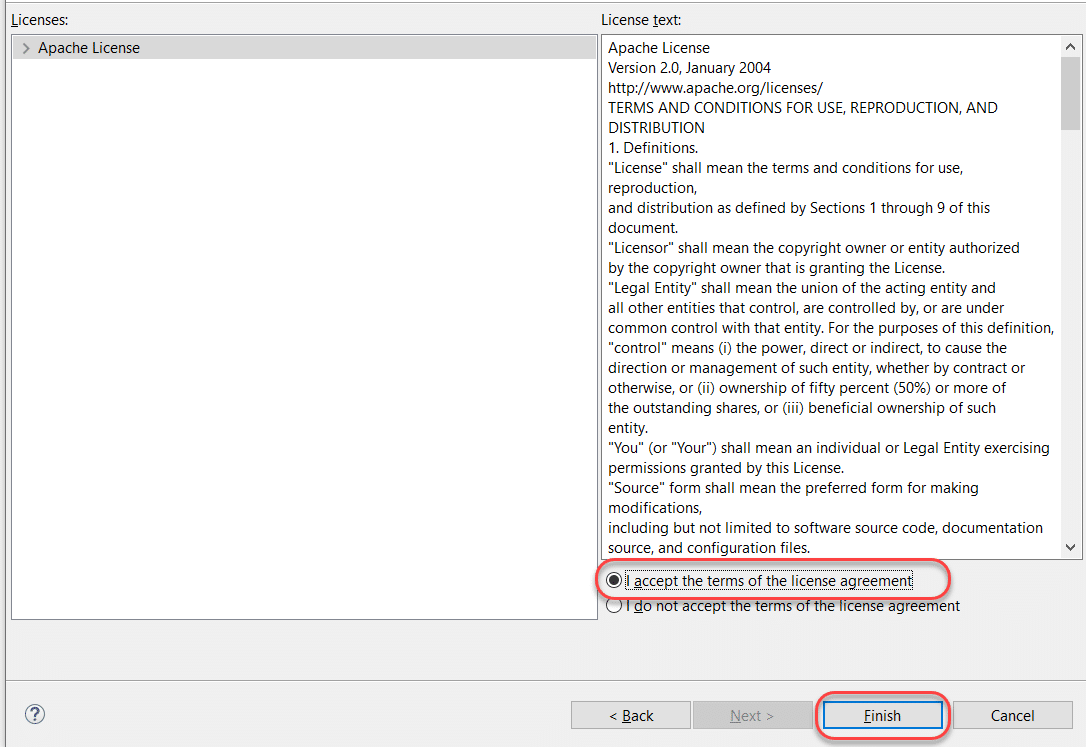
After that, accept the terms of the license agreement then click Finish.
-
You may or may not encounter a Security warning. Click Install Anyway if you do.
-
After that, click "Restart Now" to restart the eclipse and finish the installation setup.

-
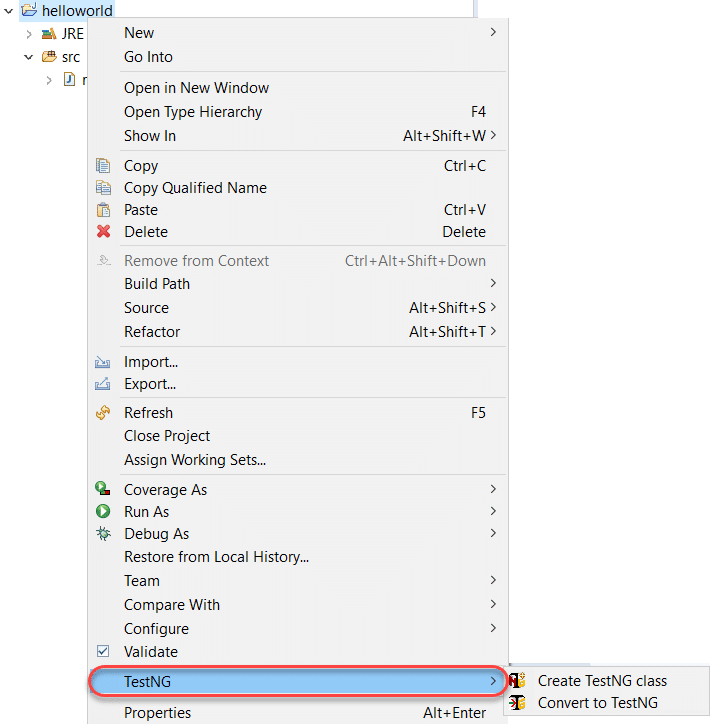
Finally, after the restart, verify if TestNG installed successfully. Right-click on your project and see if TestNG displays in the opened menu.
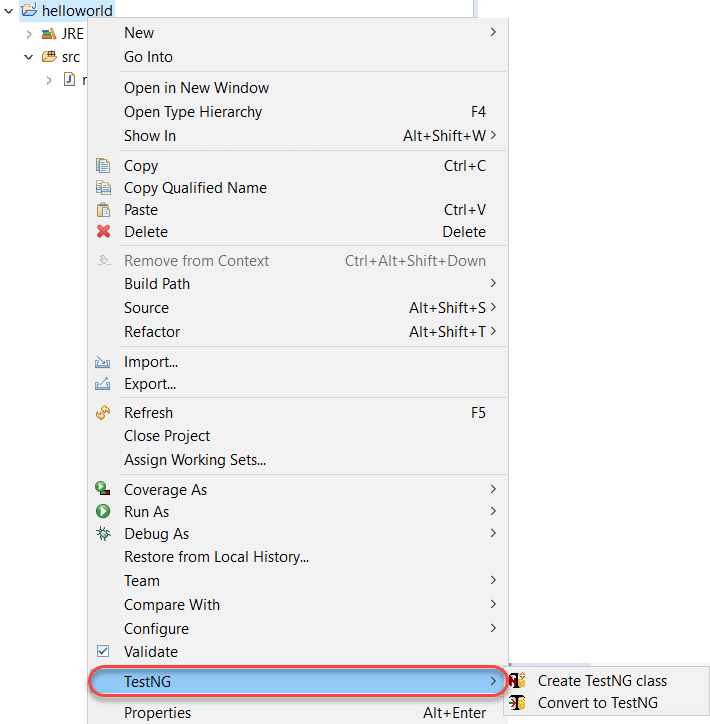
If everything has happened as stated in this post, congratulations! You have TestNG now installed on your system. Subsequently, in the next section, we will look at how to install TestNG on another popular IDE for Java called IntelliJ.
How To Install TestNG In IntelliJ?
IntelliJ is yet another IDE for running the TestNG test cases other than Eclipse. Intellij requires dependencies to be downloaded externally or through a direct link (if it is a Maven Project). Since we will be running tests on Java, we need to download external TestNG Jar File onto our system.
How To Download TestNG Jar?
TestNG Jar is very easy to install. Visit Maven Repositories and search for TestNG in the search bar.

Open the TestNG Jar link in the search results.

Select the latest release version that you see. I will use 7.1.0 as its the latest version I have.

Select the "jar" link to download the TestNG jar onto your local system.

It will download the TestNG jar file in your system. Now we need to add this jar to IntelliJ so that we can use it in our TestNG tests later in the tutorial.
How To Setup TestNG Jar In IntelliJ?
Once the TestNG Jar file is downloaded to your system, follow these steps:
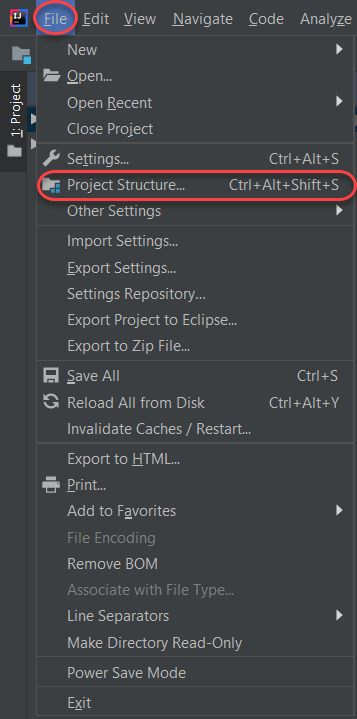
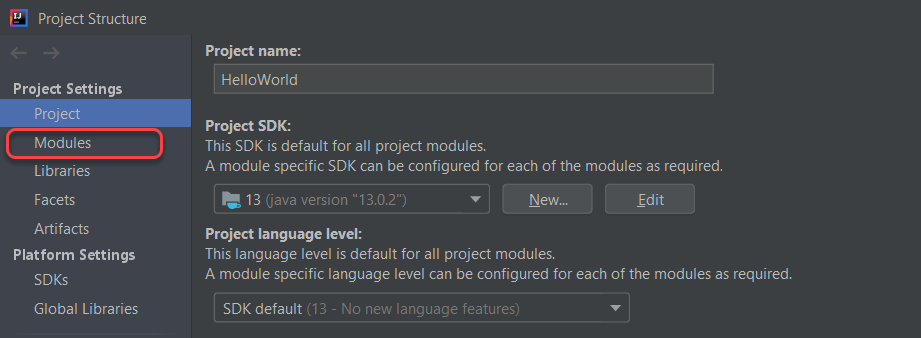
Navigate to File -> Project Structure in IntelliJ (Ctrl + Alt + Shift +S).
Open Modules panel.
Go to the dependencies tab.
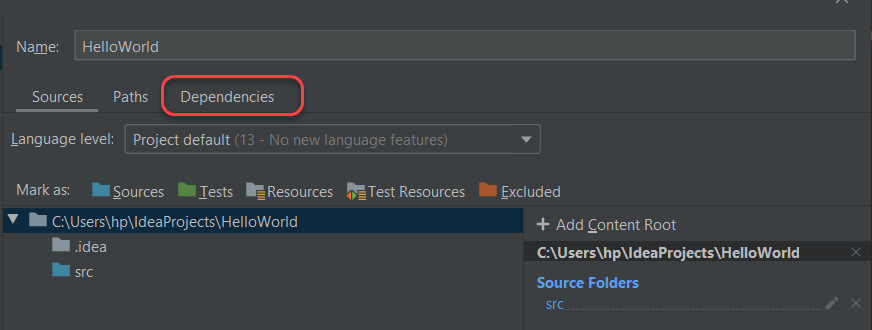
Click the "+" sign to add a new dependency and then select "JARs or directories".

Write the path where you downloaded the jar file or navigate directly through the GUI and click Okay.
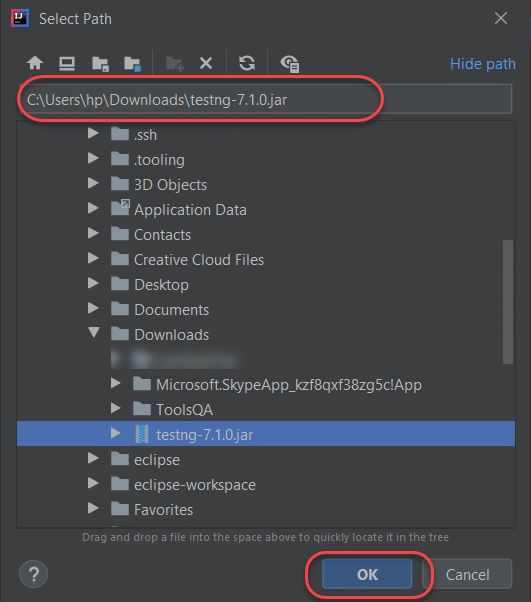
Select Okay in the returning panel, and you will have your TestNG installed in IntelliJ.
It was all in the installing section, and honestly, it was quite easy. In this course about TestNG, we will be going ahead with Eclipse and will run TestNG test cases in Eclipse. It is totally up to you what IDE you want to go ahead with as there is not so much difference between the two.
Conclusively, from the next tutorial onwards, we will try some hands-on exercises with TestNG test cases in Eclipse.
