We have already got familiar with Basic Authorization in our previous tutorial where we got the access to the server with using Username and Password. There is another type of authorization called OAuth which is a bit different than basic one. We use basic authorization for primary applications where a username and data lets us inside the server of the organization and then we can see the response with appropriate request. OAuth on the other hand is designed to let third party applications access the user data with some form of security. OAuth 2.0 Authorization
It has two versions OAuth 1.0 and OAuth 2.0. But we will not be focusing on OAuth 1.0 and will learn about OAuth 2.0 as it is standard today and used most commonly. I will explain all this in detail in the next section. In this tutorial we will focus on
- What is OAuth 2.0?
- OAuth 2.0 Roles
- Access token and authorization server
- OAuth vs OAuth 2.0
- Workflow of Oauth 2.0
What is OAUTH 2.0?
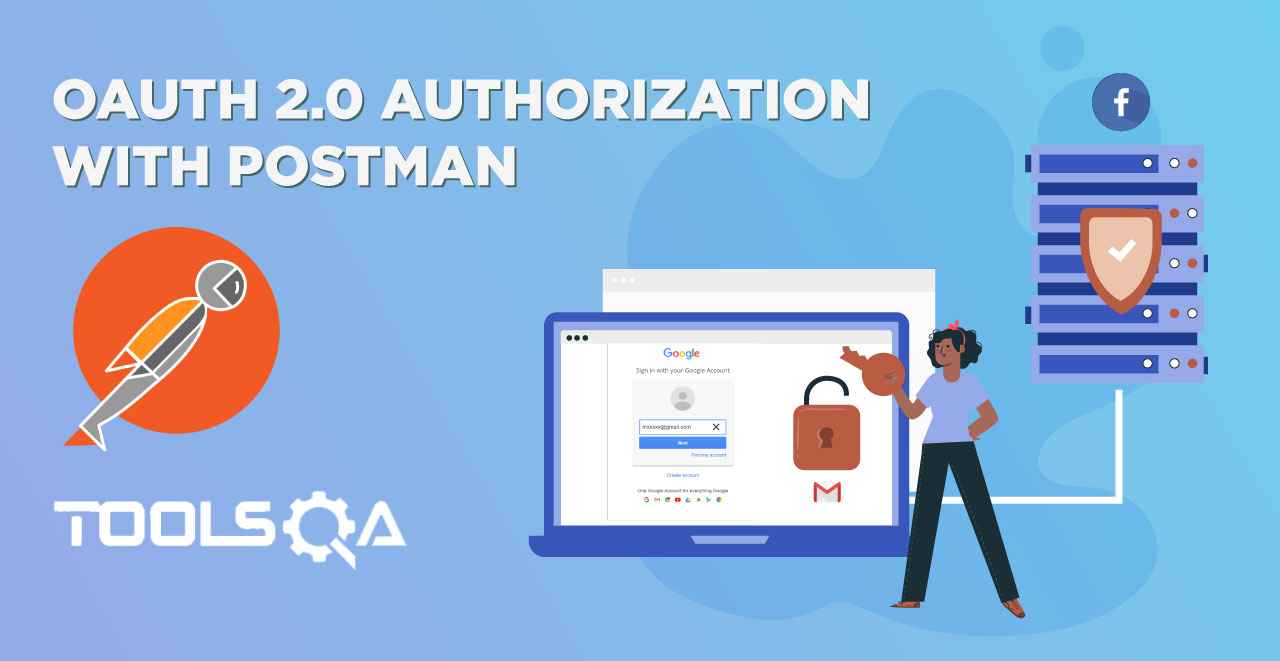
OAuth 2.0 is the industry-standard protocol for authorization and is normally recommended. OAuth 2.0 supersedes the work done on the original OAuth protocol created in 2006. OAuth 2.0 focuses on client developer simplicity while providing specific authorization flows for web applications, desktop applications, mobile phones, and living room devices. It is more of a technical terms. In simple language, OAuth 2.0 is an authorization framework that enables applications to obtain limited access to user accounts on an HTTP service, such as Facebook and GitHub. It gives access of the user accounts it has to the third party users. This is the main work of OAuth 2.0.
OAuth Roles
OAuth defines four roles:
Resource Owner / User : The user is the account owner who has his account in the database of the website from which he will authorize an another website to access his account. It is needless to say that the access is limited to the "scope" of the authorization i.e. the access will be given only how much the user wants.
Client / Third Party Application : The application is the software through which the user accesses his account or we can say that the application access the account details of the user from another website after the user permits it. This authorization process from the user must be validated by the APIs of the application and the third-party website.
Resource / Authorization Server : The resource server is the server which has the hosts accounts with itself. For example the resource server of Facebook will have it's user's account in it's database which can be accessed only through his server. The authorization server is used to generate the access token after the user grants him the permission to let the application access his account details (within the scope).
From an application developer's point of view, a service's API fulfills both the resource and authorization server roles. We will refer to both of these roles combined, as the Service or API role
Access Token and Authorization Server
An Access Token is the guarantee that the user himself has approved in the application to access the data. When a server sees the access token, it is sure that the application has proper permission for accessing the data. Since access token is so important, we need something which can handle this task with responsibility. This is done by the Authorization Server. This authorization server issues the token to the client application to access the data from the server.
At a deeper understanding, the token is divided into three parts
- Header Section: Contains the contents of the token
- Payload Section: Contains the things server needs to send back such as name, profile picture etc.
- Signature Section: This section contains the signature which is cryptographically encoded for security.
You must be familiar with this screen. This screen appears whenever you sign up through Facebook on any website.
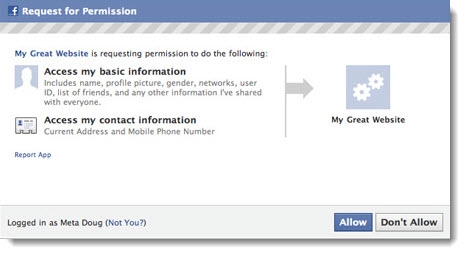
This asks for the permission from you to confirm that it is who is approving a third party application to access your limited details. This detail varies from website to website. Some might need only profile picture, some might need you details and picture. The access token has detail in it that what type of details the application wants. Since we cannot provide complete information as a security measure, this feature is required.
OAuth 1 vs OAuth 2.0
- User Experience: OAuth 1 was the earlier form of authorization and was much complicated and got very negative response from companies and users. In OAuth 1.0 you had to open your browser, sign in to the website and then the company or website (like Twitter) would provide the token. This token was then needed to paste into the application. This was a huge blow for user experience.
- OAuth 1 token were long lived. They used to expire after a long time and some tokens like that of Twitter's never expired.
- OAuth 1 required 2 tokens to be sent along with each API call.
Workflow of OAuth 2.0
Till now we have learnt about the terminologies and details of the OAuth 2.0 Authorization. In this section we will explain the clear picture of how you access your information through OAuth 2.0 authorization.
Let's say you are signing up to an Client Application called Book A Flight. This application needs your details like date of birth, profile picture and your interests. So you have got two ways to provide this information to the Book A Flight application. Either you sign up using direct method by filling details of Email Id and Password. After that you need to fill out complete details and upload a picture.
Another option is that you can sign in via Facebook through the given option and everything will be automatically prepared without your manual effort. This is simple and authentic. So we choose this way.
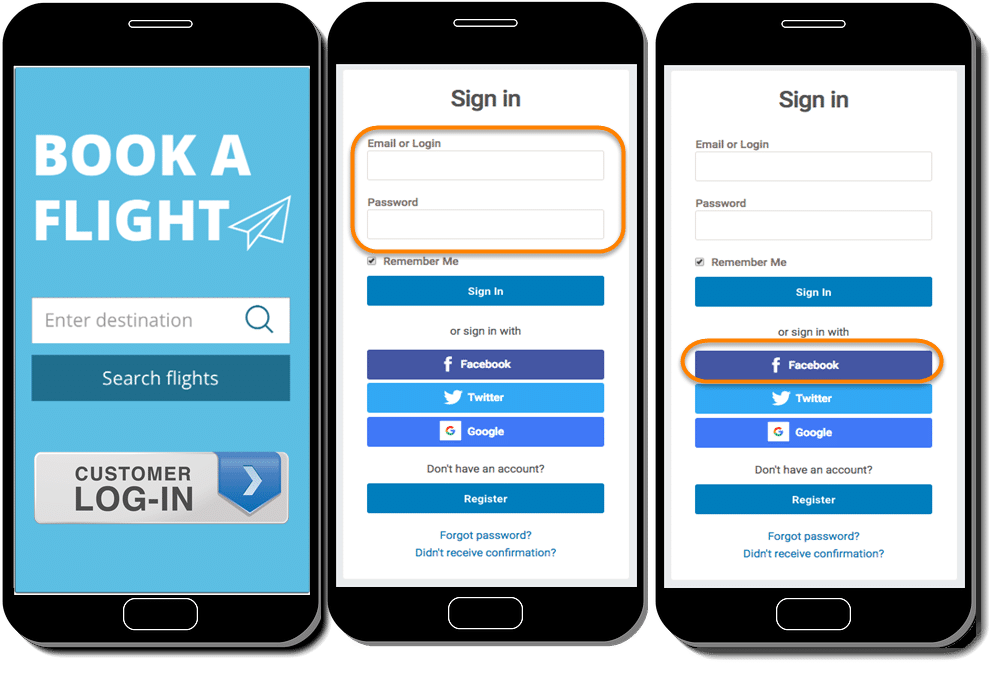
As soon as you click the Facebook button a popup will open up for you to provide access on Facebook. As shown in the below image, it request your permission on Facebook, so that it know you are allowing to share your data with the third party App "Book a Flight". But how does Facebook know which website is this, as FB can allow just every App to use their user data.
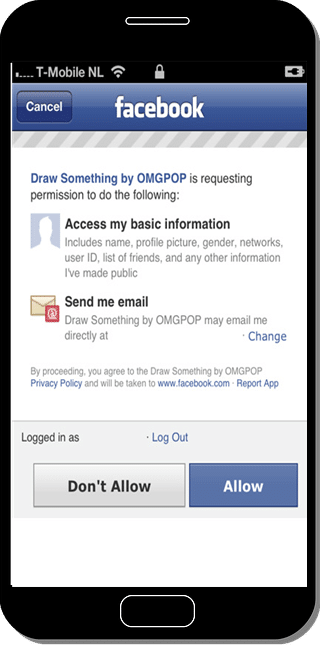
***Note *: To get the Facebook access page, the Client Application needs to be registered to Facebook.
Client Application Registration with FB/Twitter/LinkedIn etc
Before showing Facebook as an available option for signing up, Client Application needs to register with FB Application. To obtain that it needs to provide the Callback URL to Facebook, so that Facebook knows where to redirect after you have signed via Facebook.
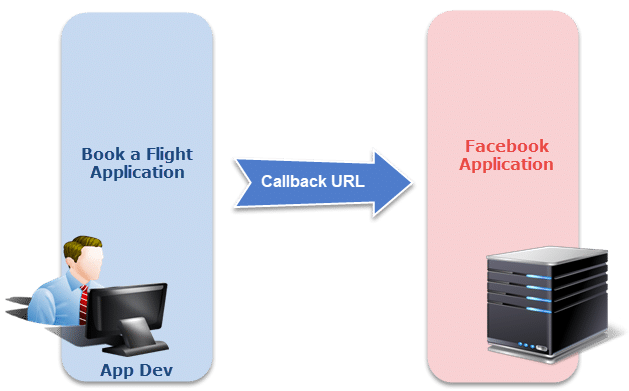
Note : To get more on Callback URL you can visit the tutorial about the OAuth 2.0 Authorization tutorial in Postman.
After the registration of the Application, Facebook will provide a Client Id and Client Secret to the application which are very important. These are used as the unique identifiers of the website/application since many websites are registered with the Facebook.
- Client ID: It is an id, like you get in your office or college so that you are uniquely identified. Here the client needs to be uniquely identified by Facebook as an application, hence it is provided an id.
- Client Secret: This acts like a password which cannot be shared. The client secret is used as an authentication identifier by Facebook every time the application makes the request.
Note: The above points are no way related to the user. This is done and set up by the application owner. It is worth knowing though.
User Authorization on Third Party App
Step 1: Now coming back to the user authorization, when you sign in using the username and password of Facebook, you are asked to allow the permission. This is called as authorization grant. In simple words, grant means agreeing to something. So here we are granting authorization over Facebook to give the required details to the third party App which is Book a Flight in our case.
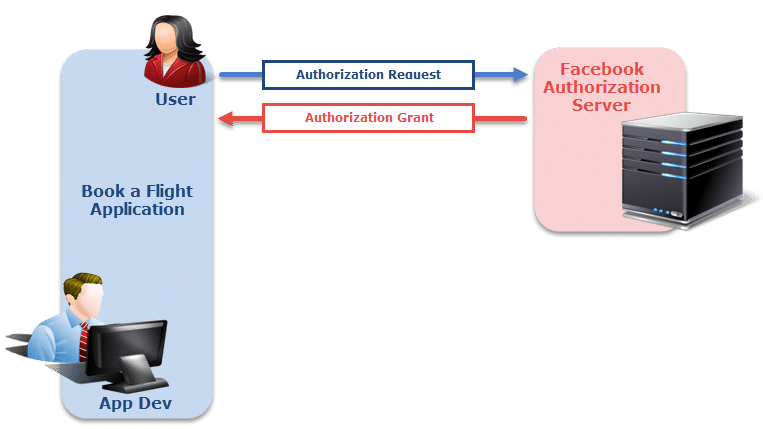
Step 2: Since the application has granted the access on User's FB account, now the application requests an access token from the authorization server (API) by presenting authentication of its own identity, and the authorization grant. If the application identity is authenticated and the authorization grant is valid, the authorization server (API) issues an Access Token to the application. Authorization is complete.
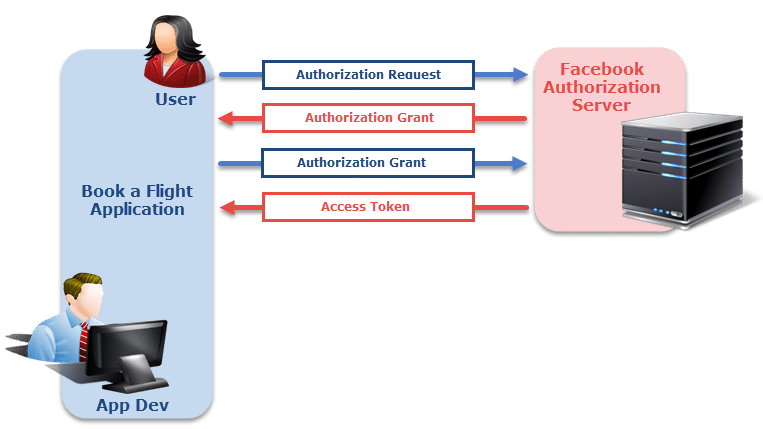
Note: Token is a guarantee to the Resource Server which has actual data and Authorization Grant is the guarantee to the Authorization Server to generate an access token.
Step 3: The application requests the resource from the resource server (API) and presents the access token for authentication. If the access token is valid, the resource server (API) serves the resource to the application.
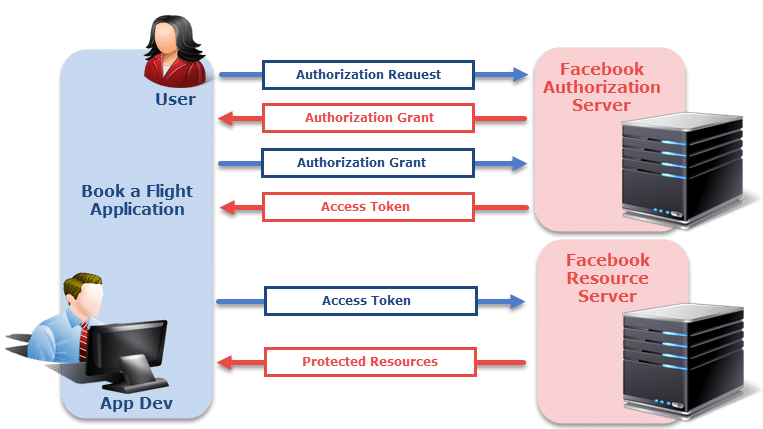
Note : The request to authorization server also contains the details that the application wants. For example, if it wants only profile picture or anything else. The token is generated accordingly so that when we show this token to the resource server, it gives only required data and not all the data.
This complete flow given in above steps is OAuth 2.0 authorization flow. By this we can easily manage our details from other application. We will perform a practical for the same with Postman and Imur Application in the next tutorial.
