Till now we have seen What is Newman in Postman and also installed it on our systems. You must have understood by now that we use shell of our system to work with Newman and take advantage of its features and functionalities. As mentioned in the introduction to Newman tutorial, we mentioned that Newman allows us to run collection in the same way as Collection Runner does in Postman. Taking the same definition further, we will be running a collection runner from Postman through Newman in this tutorial and covering the following topics
- How to Run a collection with Newman through share link
- How to Run a collection with Newman by exporting it as a JSON
To start with running a collection with Newman, first you need to have a collection in your Postman. We will be using the same collection that we used in Collection Runner tutorial which contains the following API requests. You can download it and import it in your postman through the following link. To use it, make sure you first need to Unzip the folder and upload the .txt file in postman. You can also refer the tutorial to follow the steps to import collection in postman
Now, we have added all the requests in our collection Newman Collection and everything is running fine in Postman. It's time for us to try to execute everything in our collection from Newman.
To run a collection through Newman, we have two ways to proceed.
- Through the Share Link
- Through the Json File
We will run the collection with both the methods.
Running the collection using Newman through share link
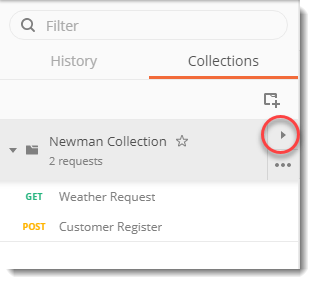
1.Click on the arrow besides the collection name.
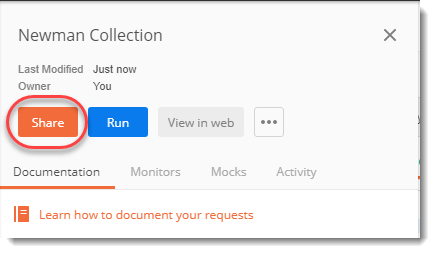
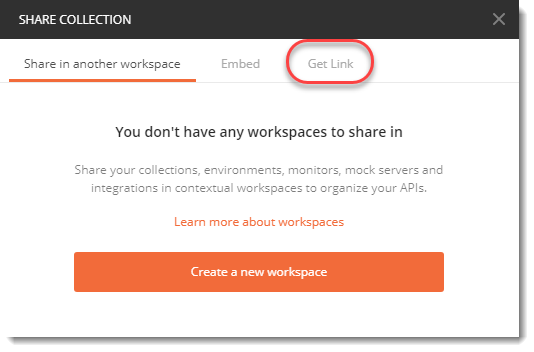
- Click on Share.
- Click on Get Link
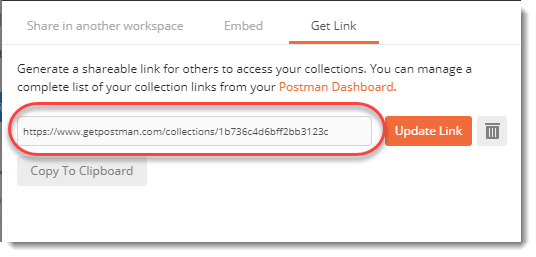
- Copy this link
5.Open your shell (command prompt for windows and terminal for mac)
NOTE: We will be using the word shell which is technical word for terminal from now onwards.
- Type the following:
newman run <link>
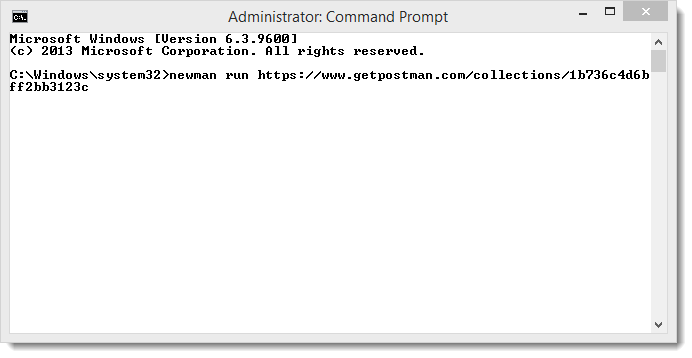
NOTE: Please input your own link which will vary from the above that we used.
- Press enter.
Your collection has successfully executed if you see the following screen
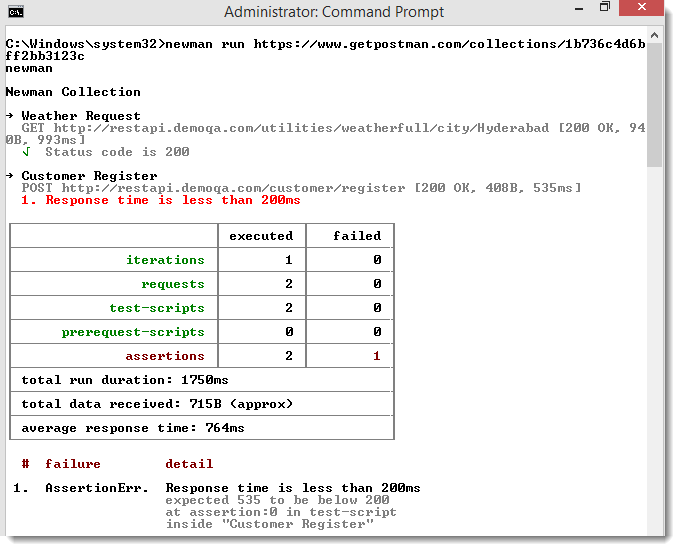
Once the collection has executed you will see the tests details as we saw in collection runner in Postman. We had one test for each of our requests, hence we see the results accordingly. It can also be seen from the image above, the details are similar to collection runner. We can see response status (time, size and status code) of each requests along with the test scripts that we executed.
Since in the weather API request we asserted the status code to be 200, which turned out correct it was not the case in customer register API. In the customer register API we asserted that the response time to be less than 200ms which turned out to be 535ms and hence, false. It can also be seen by the red line under customer register api.
Now, let us try to change the same assertion in the customer API and see the results.
How to update the link
1.Go to customer register API.
2.Change the time to be 1500ms in the tests.
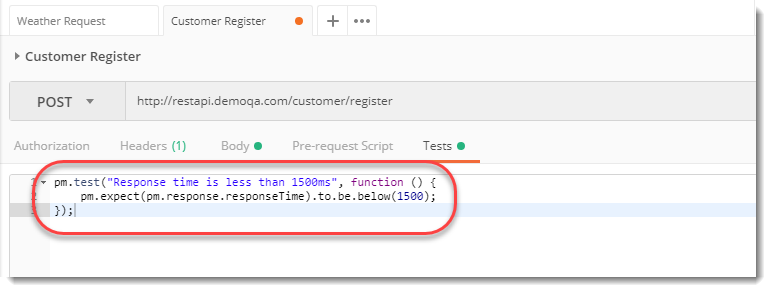
3.Save the request and run the same command again and press enter.
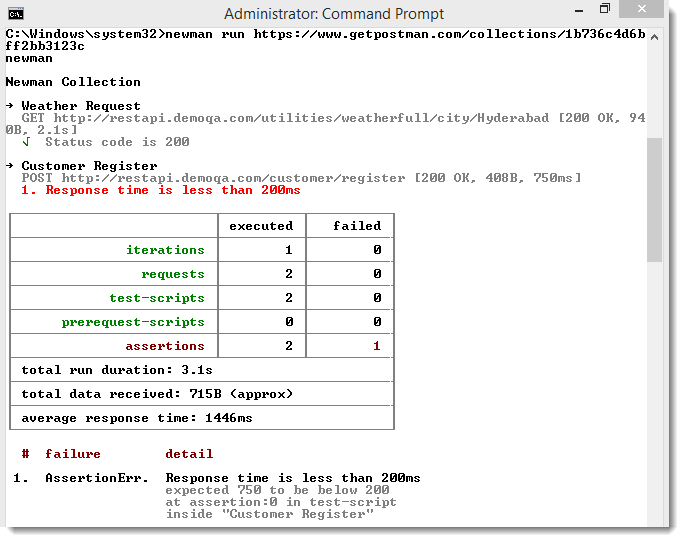
Wait! It is not the same result that we expected. This time the response time is 750 ms which is less than 1500 ms but still we get the same error with the same assertion line i.e. Response time is less than 200 ms.
This has happened because of the link not been updated. If you want to run it again then you need to follow the same steps as we did above to get the link.
This time, click on update link.
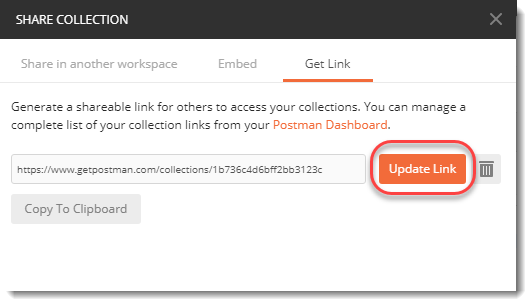
Copy the new link and run the same command in command prompt (windows) again.
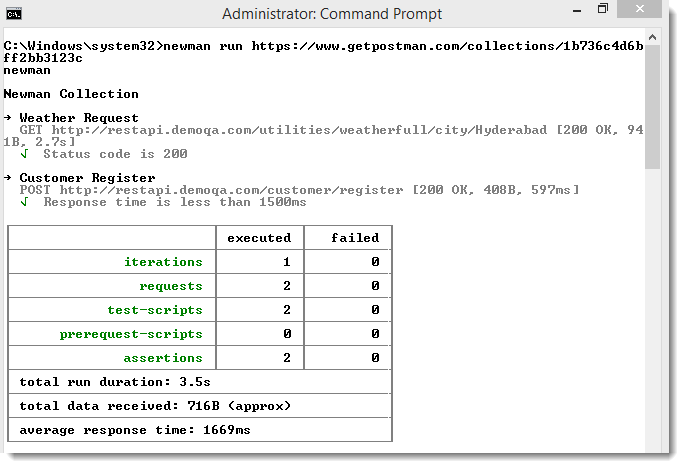
Voila! We have now got the updated and expected results out of our tests. So always remember to update the link once you have made the changes. But there is a problem in this. This cannot work while working in the team. The link just acts as a snapshot of the Postman. Once you update something in the Postman it does not gets updated automatically until you update the link. While working in teams, changes are always happening and running through links makes your API more prone to the errors. So there is another way of testing the APIs through Newman.
Running the collection using Newman through JSON file
1.Now, to get an error we will change the response time in the customer register API to be 100ms. Save this API.
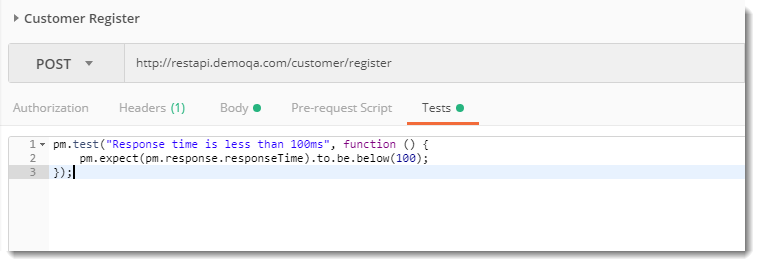
2.Click on the export link alongside the collection name (learn in Collections in Postman) and click on export in the following panel.
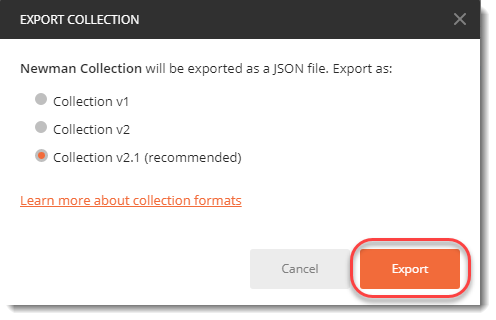
Note: Always use collection v2.1 which is recommended as discussed in the Collections in Postman chapter.
- Save the json file in your system and remember the directory.
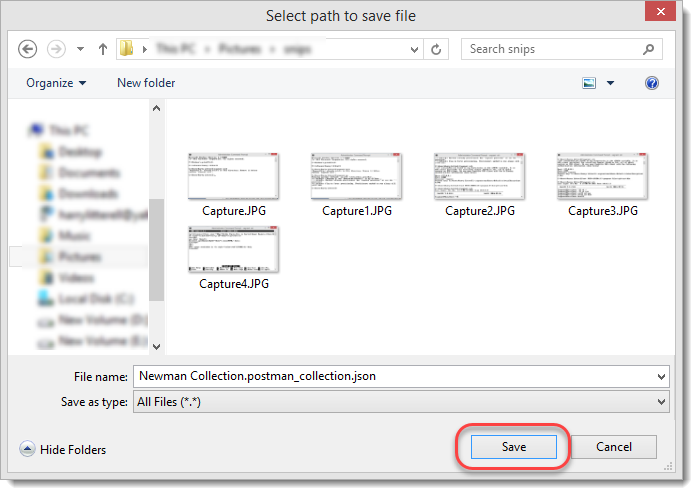
- Once you save the json file, visit the shell of your system and change the current directory to the directory in which you saved this json file.
For example: If you saved the json file in C:\harish then change the directory to C:\harish
- After changing the directory, run the following command
newman run <name of the file>
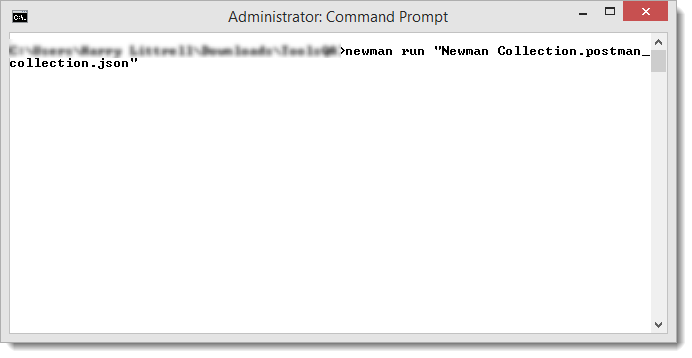
Note: Remember to place the file name in inverted commas otherwise the shell ill consider it as a directory name.
- Press enter and you will see the expected results of your collection Newman collection
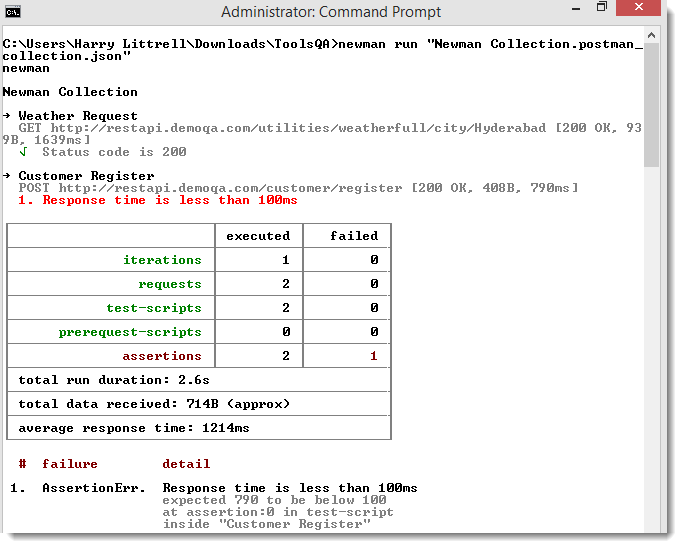
By this, we have successfully executed the collection through Newman. Error is self understandable as discussed in above sections. It was quite fun working with Newman and running our first collection from the shell rather than from the Postman itself.
Maybe you are wondering about the CI part that we discussed in the previous tutorial. There is nothing integrating continuously. You just wrote something yourself and tested it in Newman. Yes. You are right. This is not the way we use Newman while also going into CI to integrate it into the main build process. By this method, we can only check the APIs, test them and if we find any error we can report it to the issue thread of our team. While this is hectic to always exporting and running it again again, Postman collections can be tested with the main build which is our third way of testing through Newman. That is the way to go while using CI alongside. I hope these concepts our clear, we will move onto next tutorial.
